

eCourses are designed to be worked on in multiple sessions. Click on the numbers below to go directly to any class.


INTRODUCTION
Create with Multiple Figures
Welcome! Bienvenue! Willkommen!
▸ VIDEO LENGTH: 2:23 minutes
The concepts in this course are meant to spark some new and, hopefully, fun ideas in your work. Working with one figure can be challenging and learning how to combine multiple figures on a canvas can take time and effort. Remember to enjoy the process and explore options in your work.
Most of these concepts can be combined as well!
STACKING and REPEATING figures can obviously be combined with CROPPING, for instance. I hope you have fun with these ideas and that they inspire you to create and explore.
Course Guidelines
MATERIALS
I use different mediums in this course. My main medium is oil paint, often used with cold wax, however I use acrylic in this course as well.
You DO NOT NEED TO SPEND A LOT OF MONEY on new art supplies. The intention is to get you to play with a few new materials to discover new ways of working, and also to awaken that inner sense of play. Please feel free to use your onw paint colors and materials in this course.
ONLINE ART STORES AROUND THE GLOBE
I list here several options for your painting supplies. Obviously there are many more, and I cannot list one for every country; however I try to list one for almost every continent to get you started!
USA Dick Blick, Jerry’s Artarama
UK Jackson's Art , Ken Bromley
AUSTRALIA The Sydney Art Store
NEW ZEALAND Takapuna Art Supplies
EU Boesner , Van Beek Art , Le Géant des Beaux-Arts
CANADA Curry’s Art, Aboveground
SOUTH AFRICA Loot

STORE LOCATOR
← Click on the logo to locate stores around the world that carry GAMBLIN products.
HAVING TECHNICAL OR INTERNET ISSUES?
The videos in this course are now DOWNLOADABLE! If you are watching them via WI-FI, however, every now and then the videos may pause or not reload. This can happen because of slow internet speed or because several people may be using your internet at the same time. To run the videos smoothly you will need a fast internet. Periodically it has to do with Vimeo and their technology. If the latter is the case, be just a bit patient. Try refreshing your browser or possibly changing your browser. Wait a few minutes, and/or try watching a different video. If it is on Vimeo’s end, this problem typically resolves itself within a short amount of time.
RECOMMENDED PRODUCT
〰️
RECOMMENDED PRODUCT 〰️
PROCREATE
Cost is $12.99 USD — as of July 10, 2024
Procreate is an app that is available on Apple iOS products (iPad and iPhone). I use it almost everyday and highly recommend it. I’ve included a short tutorial here to give you the very basics of how you can use Procreate with your painting process.
Possible Ways to Use Procreate:
After developing my actual painting for awhile, I will switch to Procreate to study possible compositional and color changes.
I use it in my teaching to show students how a change in their painting could look.
It is great for artists of all levels to use it as a sketchbook.
It allows you to take an old painting that you might like to re-create and try different palettes and compositions.

OVERLAPPING FIGURES

Spark It! - Quick Figure Sketches
Let’s Warm Up With Sketching!
In this warm-up we focus on overlapping figures. This concept may not be new to many of you, but it is a great warm-up and an important tool. It is important both for developing your drawing skills and also for looking at possible compositions for larger work as we shall see.
I use three different mediums in this video. I recommend using charcoal for one drawing so that you can erase and manipulate your work, and then using something permanent, like a marker pen, for another drawing so that you cannot alter your marks. These two approaches can give you very different results.
Please Note: Each video in this course has its own unique password.
▸ VIDEO PASSWORD: Spark4
▸ VIDEO LENGTH: 20:37 minutes
EXERCISE INSTRUCTIONS:
Create several quick sketches using multiple overlapping and/or connecting figures.
My reference photos are on the Pinterest Reference Library link below if you choose to use the same images.
Draw two, three, or four figures.
Make sure they overlap and connect.
You may repeat the same figure. They do not need to be different figures.
Use a ‘correctable medium” for one sketch, and a “permanent medium” for another.
Create as many sketches as you like.
Try to spend no more than four minutes on each figure. (A painting with three figures would be twelve minutes).

MODEL IMAGES REFERENCE LIBRARY
Use these images if you wish to use the same images for this exercise.
Throughout the classes I provide PINTEREST BOARDS for a specific relevant topic. Click on the logo to see the examples gathered in the various categories.

Artist Focus
〰️
ANDRÉ LUNDQUIST
〰️
Artist Focus 〰️ ANDRÉ LUNDQUIST 〰️
— Click on any image to see larger —


There is so much more to these paintings than what you first glimpse! Remember how we layered our Spark it! figures? Lundquist’s work is a very sophisticated version of working with that concept. Click on each painting to enlarge the image and zoom in. Each painting has multiple figures, many of them hidden in layers but visible if you really look. André obviously has excellent drawing skills which definitely help with this approach.
Project: OVERLAPPING FIGURES
In this project we will take inspiration from Lundquist and also from our Spark it! this week. I am no expert at painting overlapping figures such as these. I am learning as I go in this project just like you will. I do find this method fascinating and challenging and I intend to bring parts of it it to my large work going forward. I highly encourage you to try this concept. I will add that I feel it is a fairly advanced method so don’t feel badly if you find it challenging. I also believe that you will discover and learn from trying it.
I used Oil and Cold Wax medium for this painting.
Please Note: Each video in this course has its own unique password.
▸ VIDEO PASSWORD: Overlap
▸ VIDEO LENGTH: 27:11 minutes
YOUR TURN:
Things to remember:
Feel free to use your Spark it! as a jumping off point for this project.
I used Sharpie markers to make my lines so that they would remain permanent. This is optional.
Scale makes a big difference (pun intended). I encourage you to work as large as possible. This project is easier in a larger format.
Bonus Exercise: OVERLAPPING DRAWINGS BY LAYERING
Here are several images of Richard Diebenkorn’s work. See how he re-draws the figure several times leaving ghosts of the earlier marks? These layered sketches illustrate a classic method used in life-drawing classes (drawing from a live model). This technique is typically done by sketching in charcoal, smearing/erasing and repeating. In some of these he has gone back in with paint and/or ink. Feel free to create work using this approach as well.
Artist Focus
〰️
RICHARD DIEBENKORN
〰️
Artist Focus 〰️ RICHARD DIEBENKORN 〰️
— Click on any image to see larger —


CROPPING FIGURES:
Four Design Concepts Using Cropping
Cropping is such a great design concept to immediately give interest to your figurative paintings. Below are four examples and a brief description of these concepts to help you remember them. Be sure to watch the video for further inspiration and explanations.

1. FRONT CROP
Cropping and pulling figures to the front of the canvas.

2. BACK CROP
Cropping and pushing figures to the back (top) of the canvas.

3. EDGE CROP
Pushing a figure to the edge and cropping it.

4. GROUP EDGE CROP
Pushing ALL (or almost all) of your figures to the edge (typically the top of bottom of the canvas) and cropping them.
Video: FOUR DESIGN CONCEPTS USING CROPPING
Please Note: Each video in this course has its own unique password.
▸ VIDEO PASSWORD: Multiple
▸ VIDEO LENGTH: 17:02 minutes

Project: CHOOSE A DESIGN
In this video I do quick studies of two of these design concepts. I’m looking at composition and spatial relationships of the figures and space around them. Small quick paintings like this are great studies for larger work. I apologize for my very stuffy nose! I had an allergy attack that day.
I used acrylic paint in these demos.
A little secret: it is very challenging for me to paint multiple figures this small. I would typically do this type of work on a three, four or five FOOT canvas! So these demos are ‘risky’ for me.
Demo: FRONT & BACK CROP
Please Note: Each video in this course has its own unique password.
▸ VIDEO PASSWORD: Front
▸ VIDEO LENGTH: 19:59 minutes

YOUR TURN:
Things to remember:
A general cropping rule: Do not crop the figure at a joint such as a knee, ankle or elbow.
Do not crop a figure at the neck, unless you are making a specific statement. Cropping at the neck reads as a “guillotine” cut and is generally uncomfortable.
Try playing with perspective. You do not need to be realistic! Push towards abstraction with your perspective. See what happens!
Remember the three-quarter and one-quarter rule for cropping.
Artist Focus
〰️
ZOEY FRANK
〰️
Artist Focus 〰️ ZOEY FRANK 〰️
— Click on any image to see larger —


In the demos above I planned the placement of most of the figures, and I talk about quick studies ahead of time to work out some design issues for a larger canvas. This artist works very differently.
Prepare to have your mind “blown” as you look at the work of Zoey Frank. A skilled draftsman she renders both the figures and their surroundings with an astonishing command of color and inventiveness. Here are a few photos of her work, but wait till you see her process. It is fascinating! In this short video you will see a time-lapse creation of one of her paintings. Watch how she develops the painting by moving, adding and subtracting objects, shapes and human figures.
If you care to learn more about her go to YouTube and search for Zoey Frank. There are several filmed interviews and discussions with Ms. Frank available to watch.

STACKING FIGURES:
Definition Of The Term & Concept

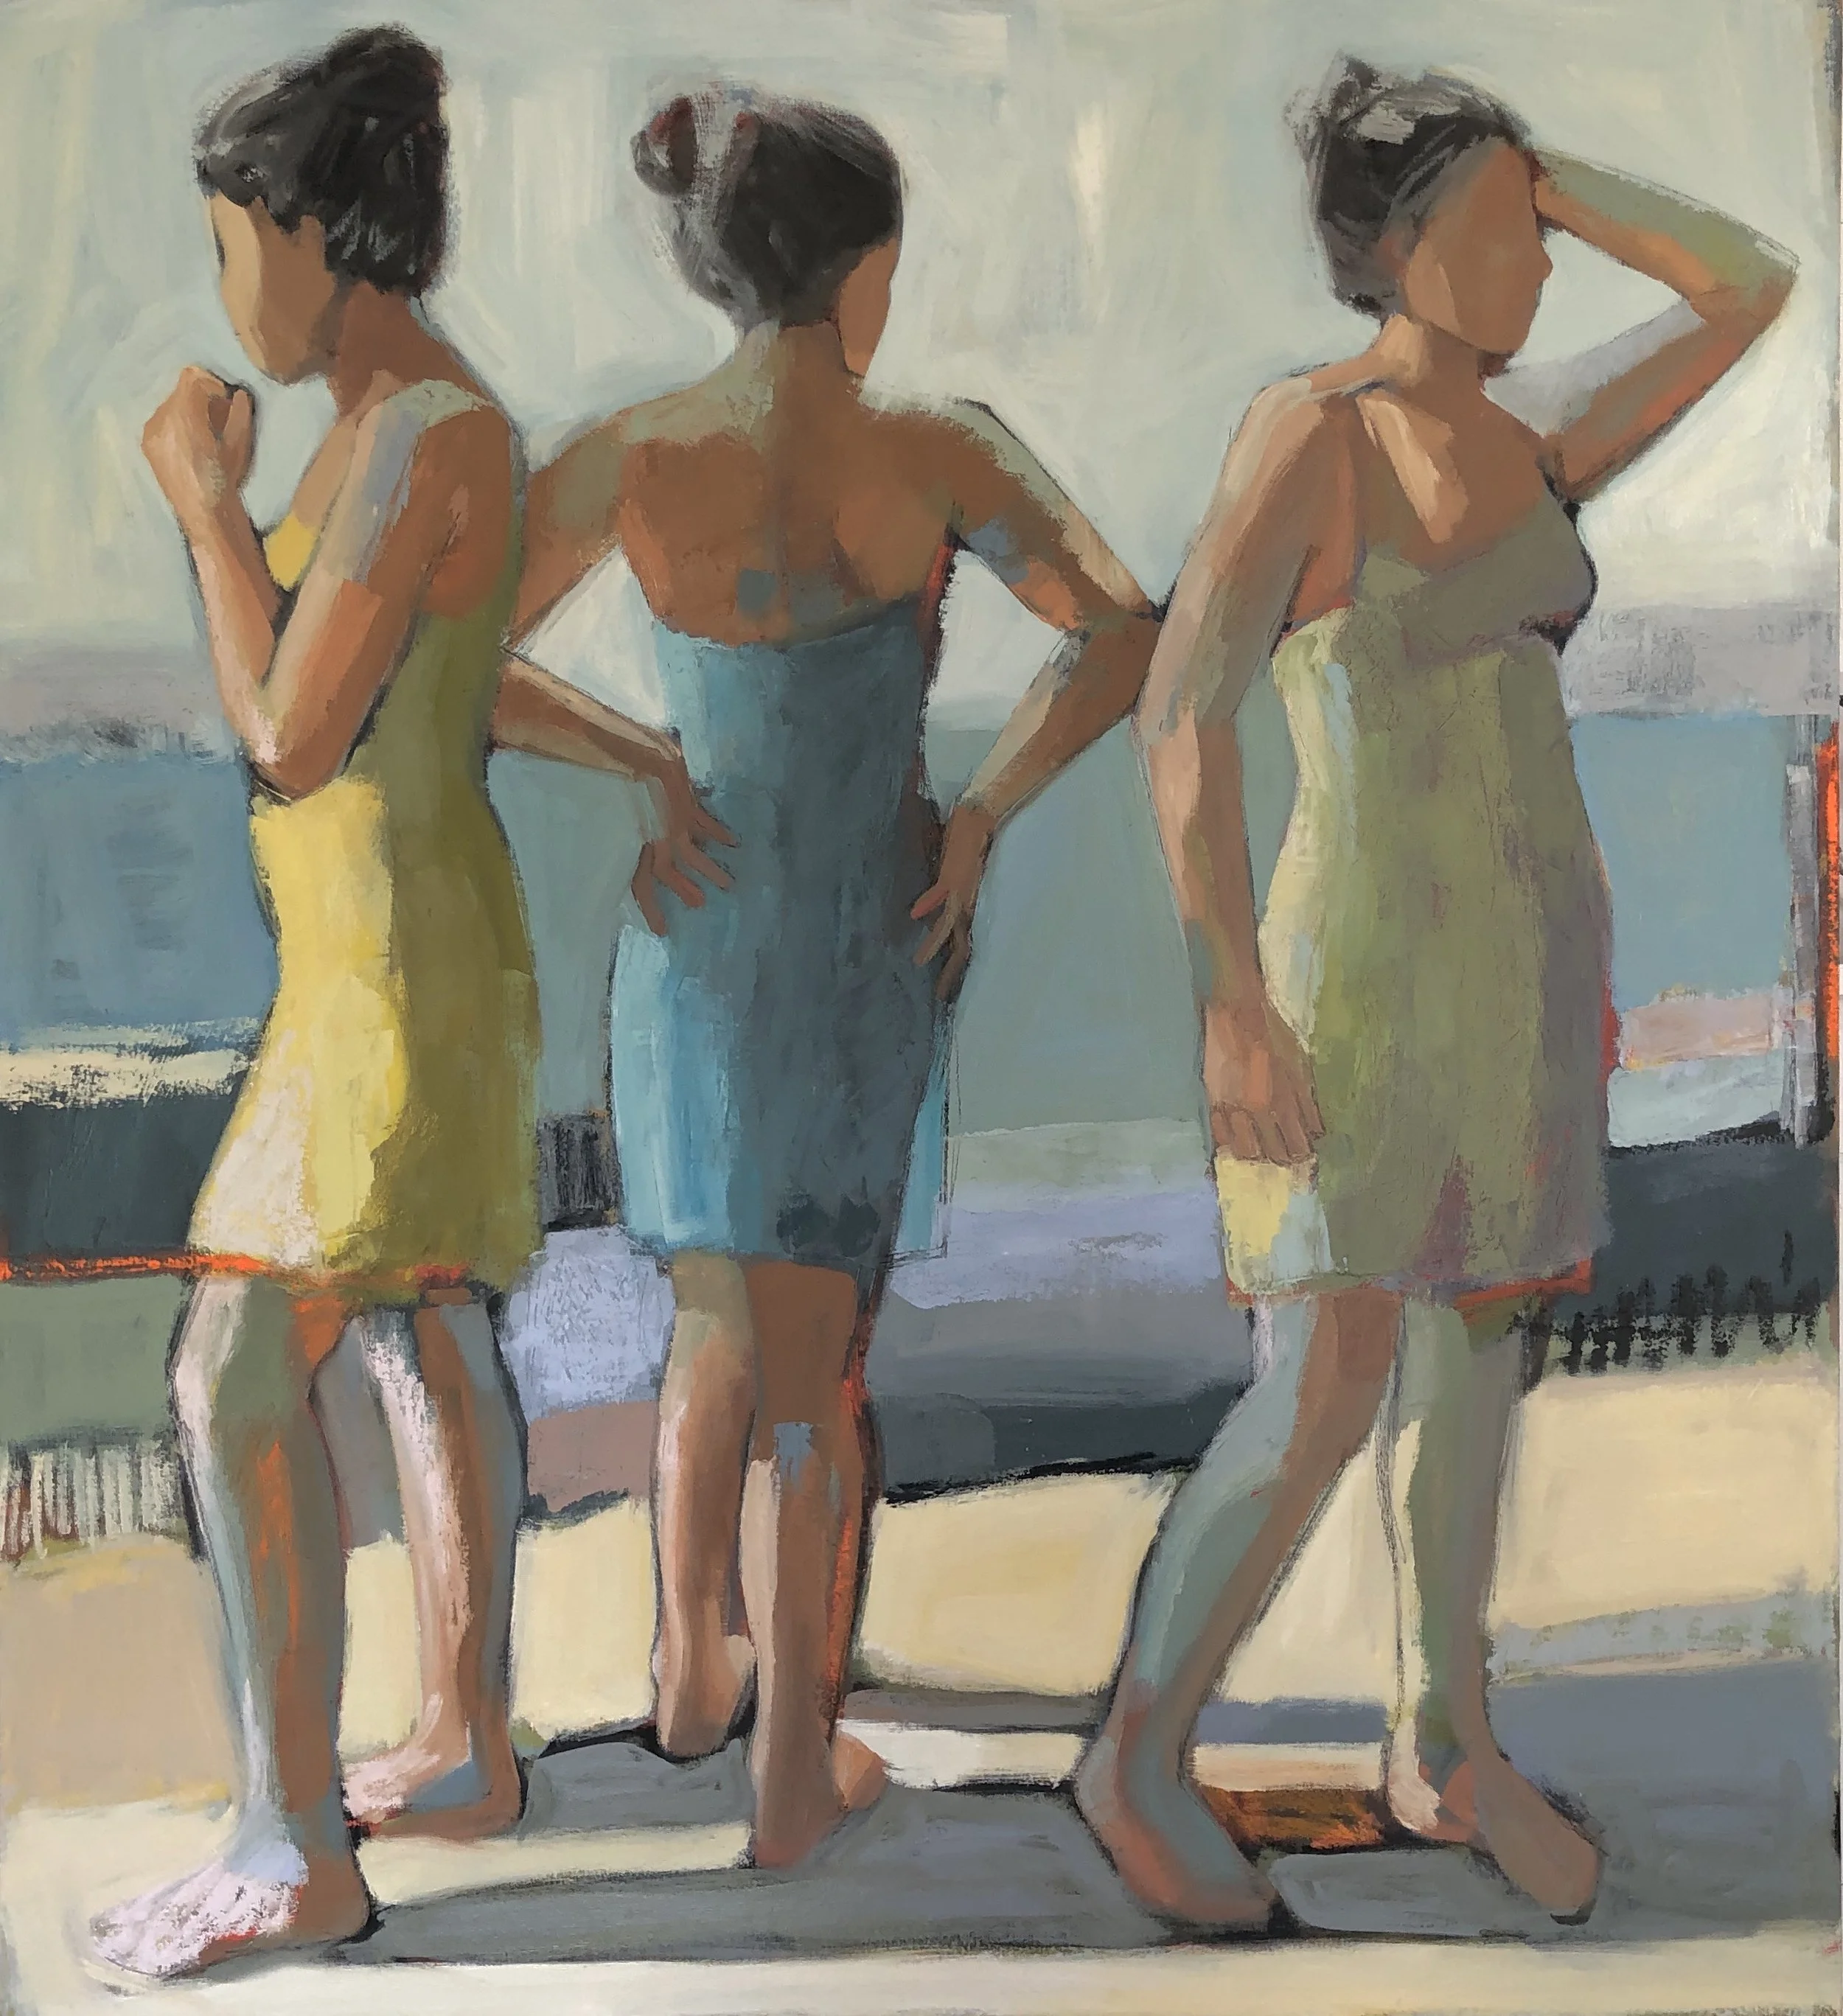
What are “Stacked Figures”?
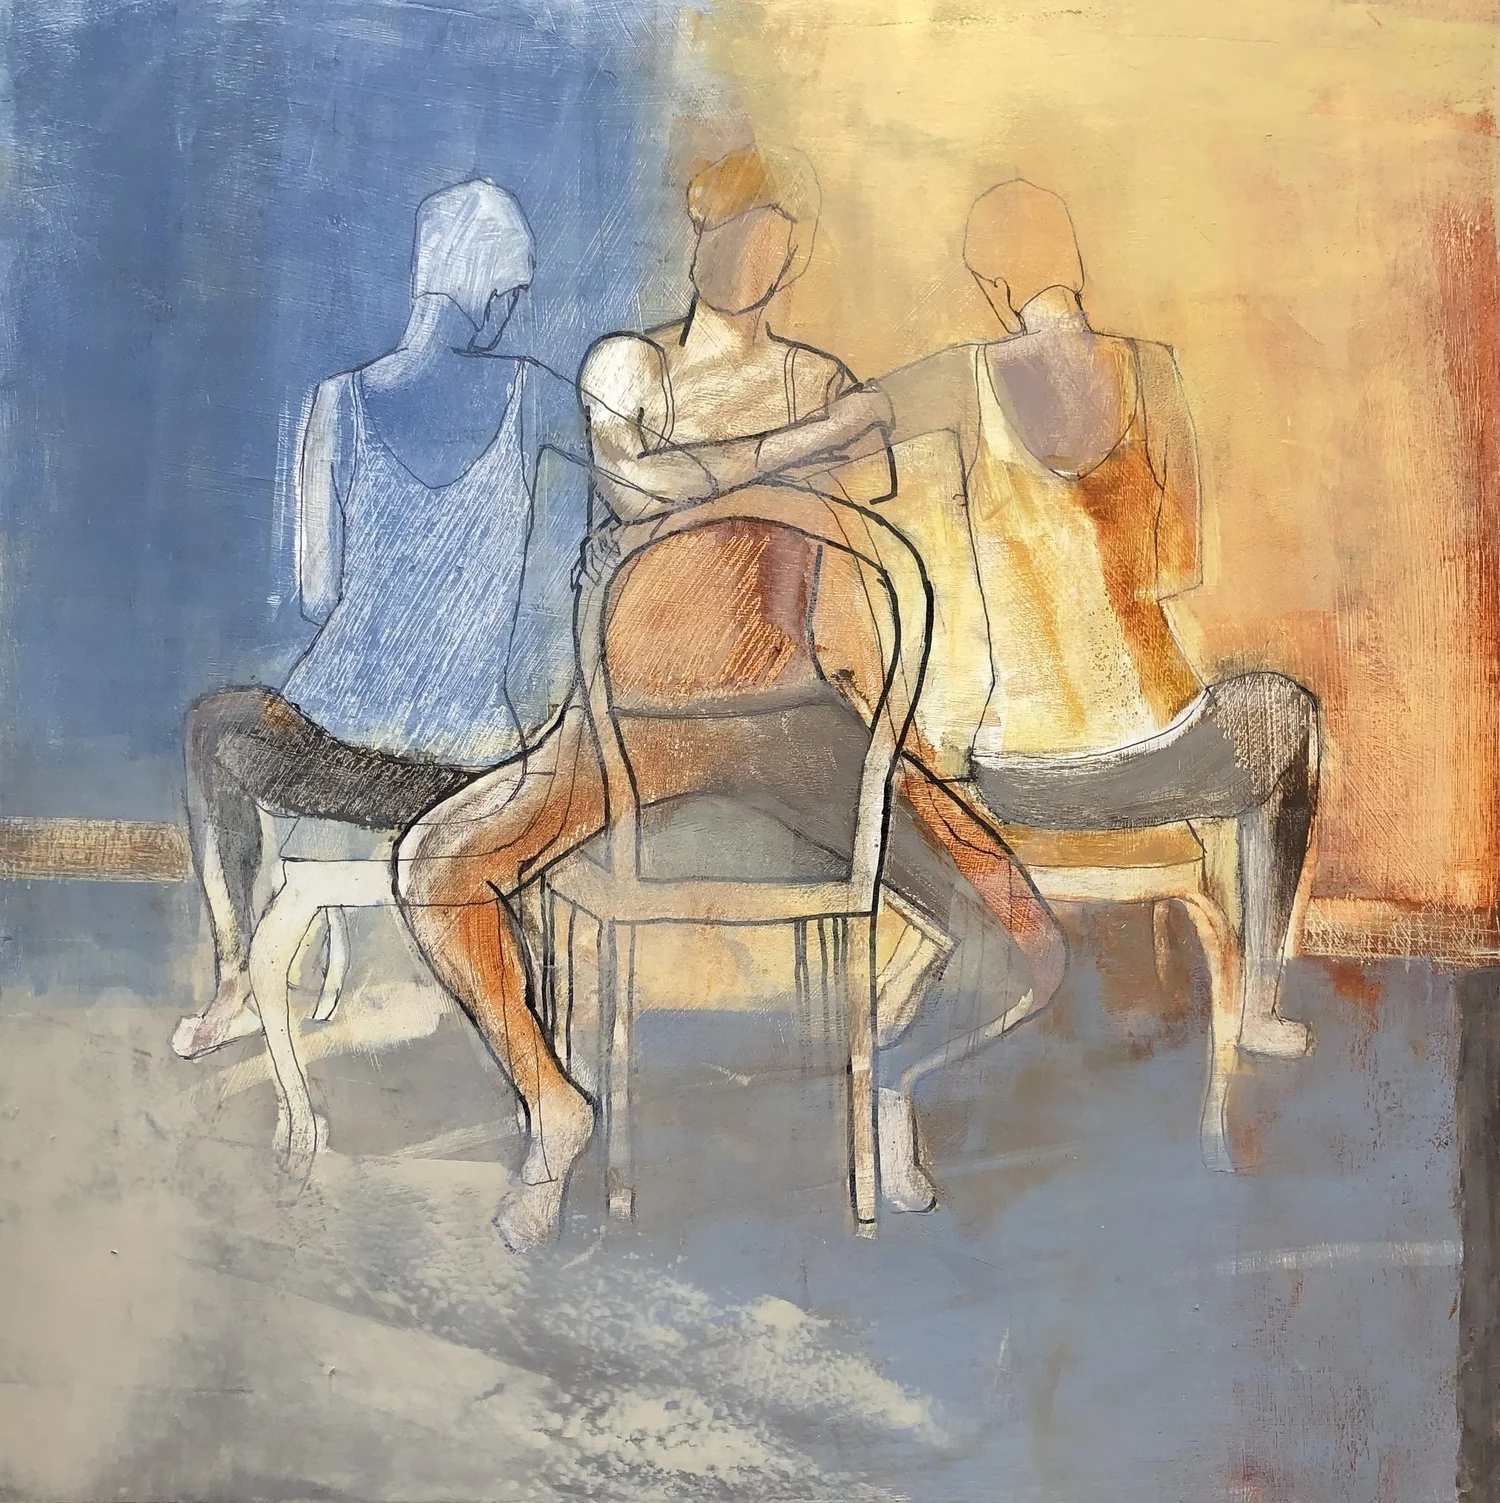
Stacking Figures is a term I use to describe the concept of connecting figures together in your composition so they are reading compositionally as one object. A great example of this is Paul Wonner’s painting shown here. There are clearly two figures but grouped together they feel joined as one mass in the painting.
Stacking or connecting figures immediately creates a relationship between them. An energy and narrative becomes apparent on the canvas. We have narrative whenever there are two figure on the canvas, however connecting the figures and/or placing one in front of the other can be somewhat unusual and can often create interesting compositions.
VIDEO: Several artists who have used Stacked or Connected Figures in their work.
Please Note: Each video in this course has its own unique password.
▸ VIDEO PASSWORD: Figures
▸ VIDEO LENGTH: 12:00 minutes
Give Yourself Permission To Be Creative!
Before we begin the next project, let’s take a look at this inspiring video which emphasizes the spirit of play and personal creativity!
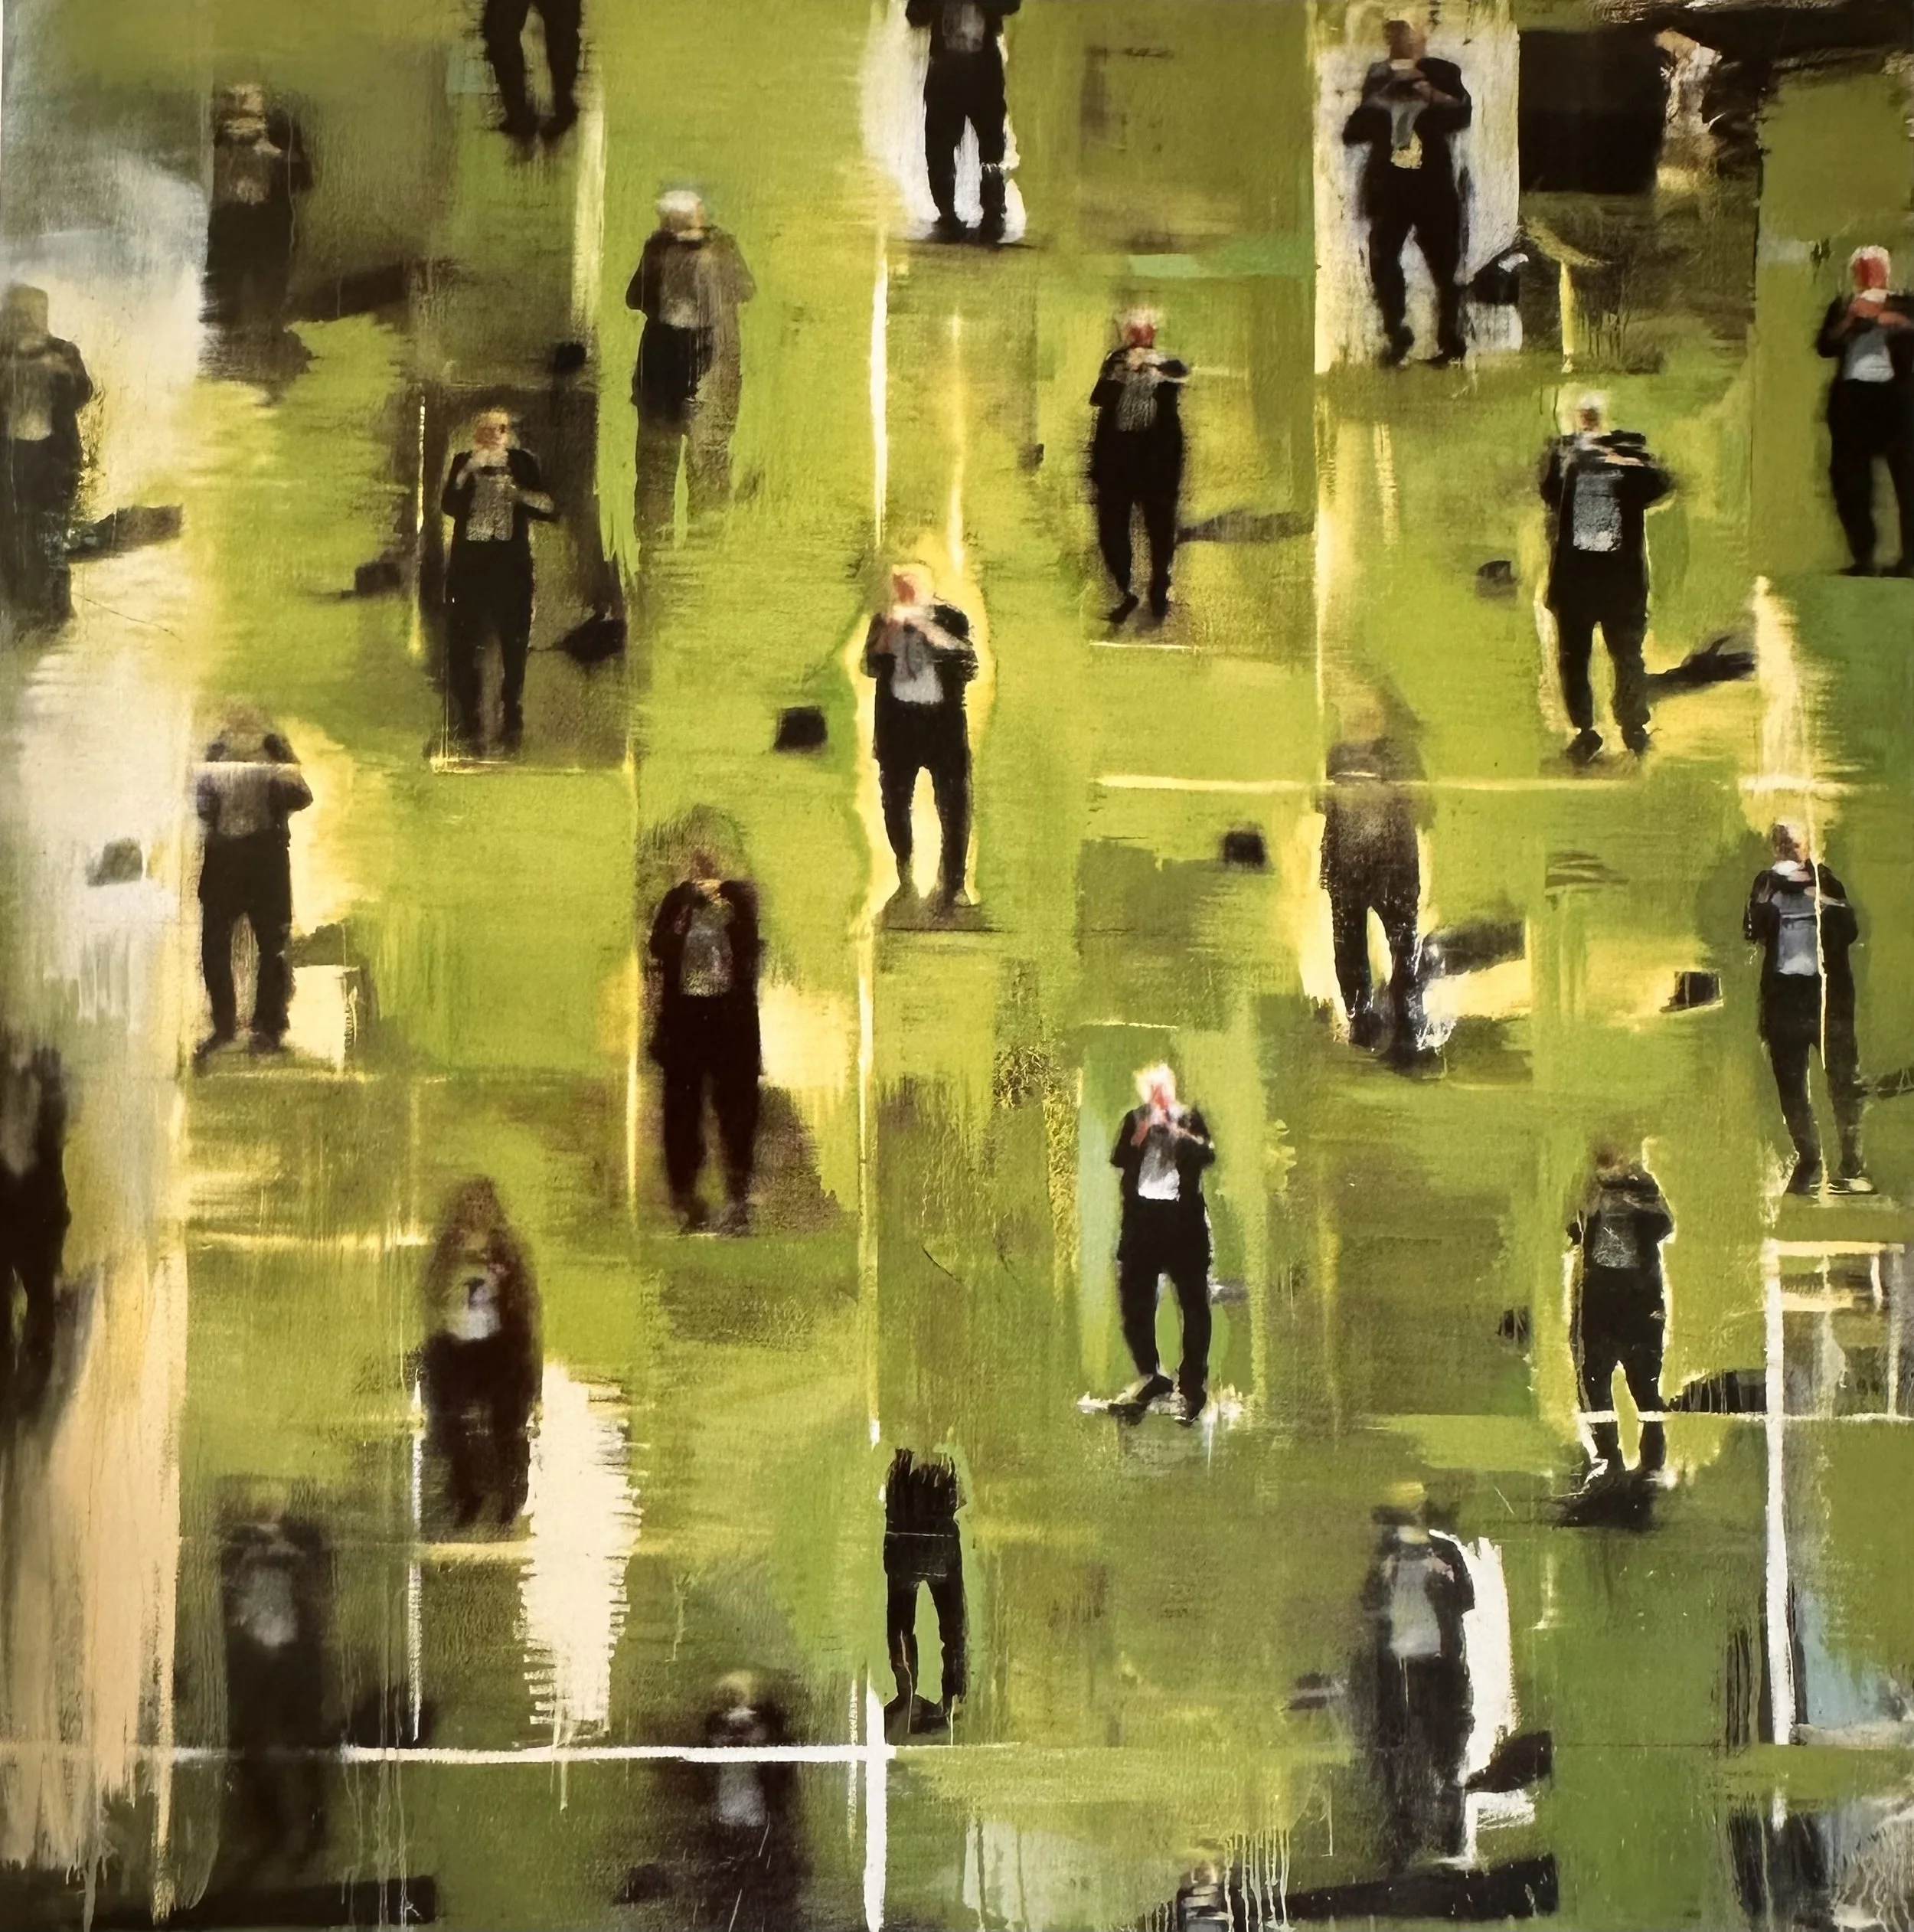
Project: CONNECT THE FIGURES
I use oil and cold wax in this demo. The composition of this painting was planned in a preliminary sketch, which is not how I typically work as most of you know. I do find that with multiple figures, however, having a general idea of your figure placement beforehand is helpful and sometimes necessary.
I also stop at one point and make some decisions in Procreate before I proceed with some major changes to the painting.
NOTE: For some reason it is very hard to get the yellow green color I was using to film correctly both on the video camera and on my iPhone. The colors in the photo below are fairly accurate. The video color slants a bit more towards the yellow instead of the green. The color in the image shown at the end of the demo is more accurate.
Demo: PART ONE
(The demo is divided into two videos for ease of downloading)
Please Note: Each video in this course has its own unique password.
▸ VIDEO PASSWORD: Stacked1
▸ VIDEO LENGTH: 28:07 minutes
Demo: PART TWO
▸ VIDEO PASSWORD: Stacked2
▸ VIDEO LENGTH: 13:00 minutes
YOUR TURN:
Create a painting with two figures stacked. You will be creating a narrative just by using this placement/concept. In your work, look at how the stacking concept can potentially create an interesting composition.
Things to remember:
Are the figures in a large space (like Diebenkorn’s or Christensen’s)
Are the Figures brought forward and cropped at the front or side? (like Wonner’s)
What is the dynamic or energy that you want your figures to portray?
Artist Focus
〰️
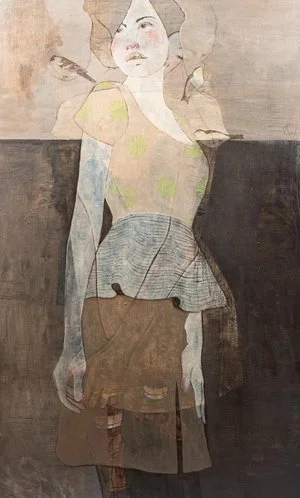
VERONICA CAY
〰️
Artist Focus 〰️ VERONICA CAY 〰️
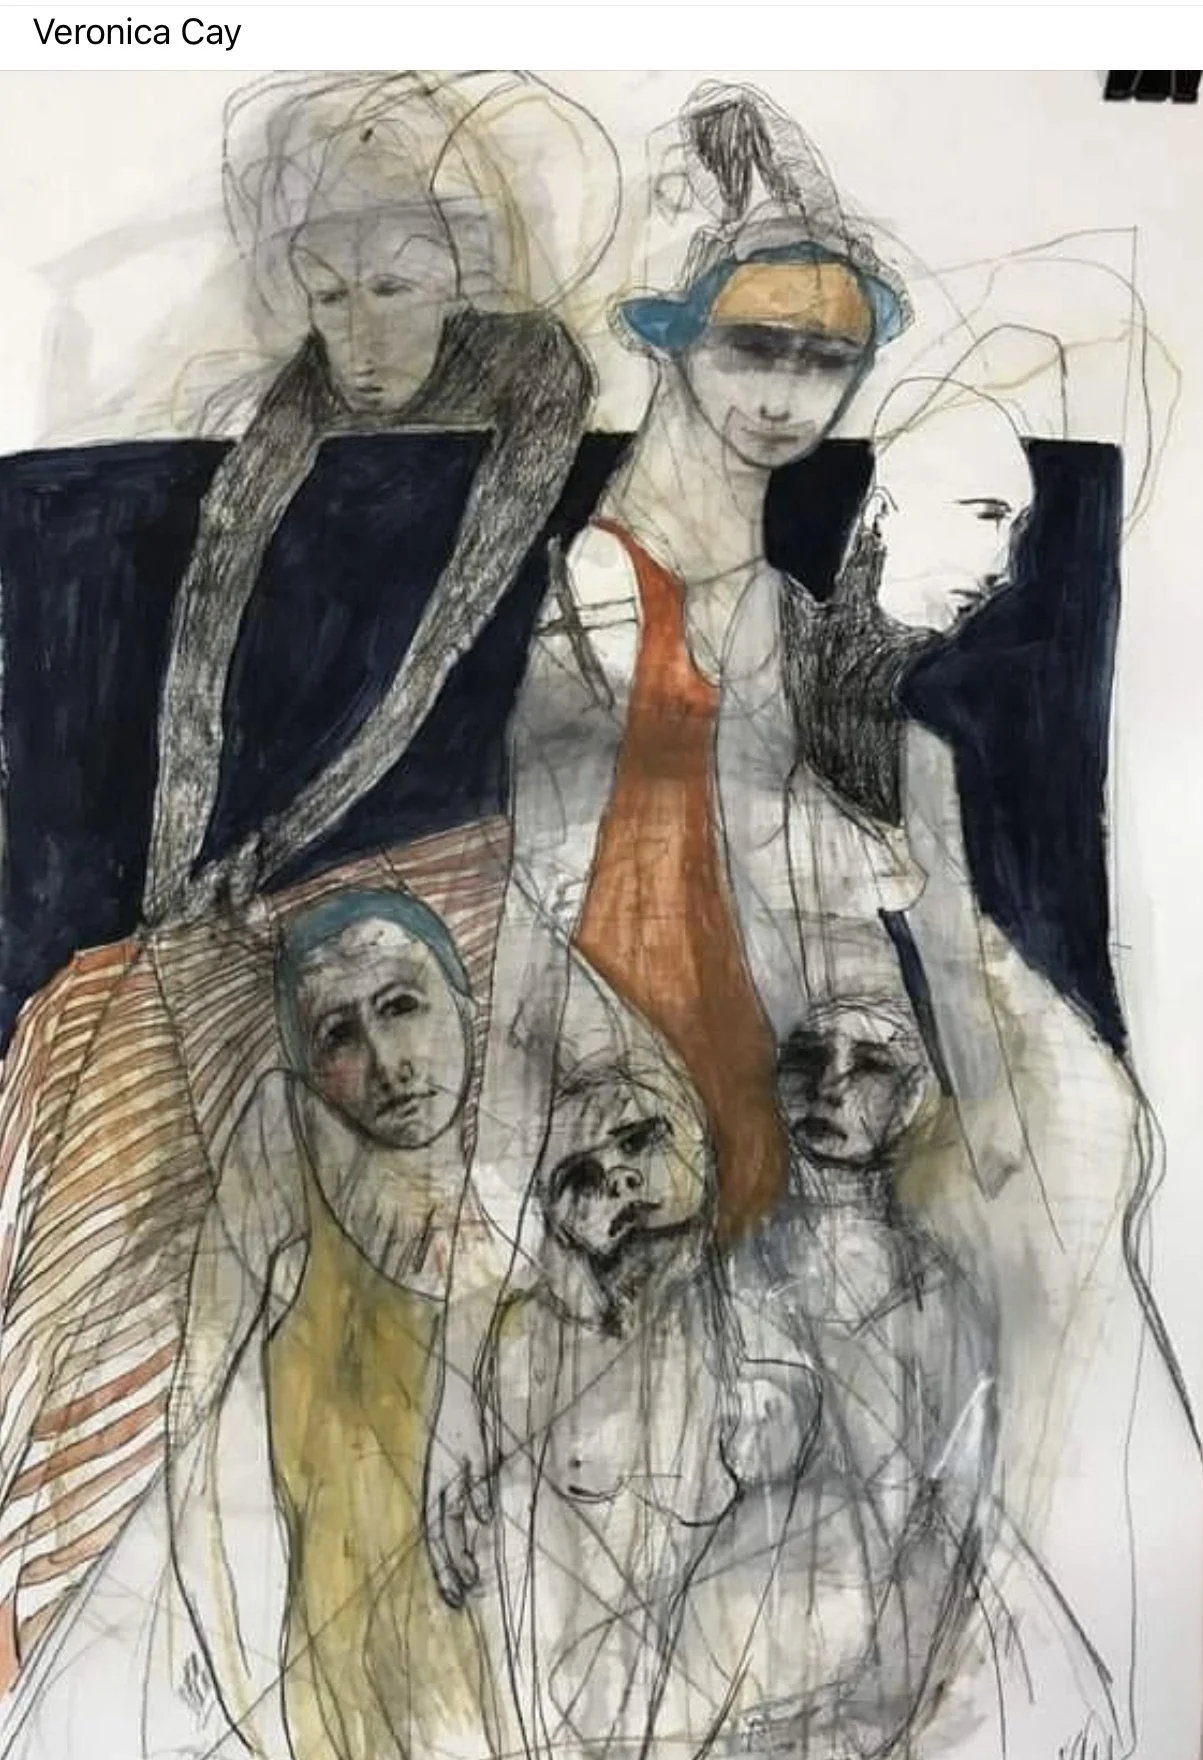
Veronica Cay is AMAZING!
A super creative (she does sculpture too), she uses multiple figures in most of her work. These images are not specific to “Stacking Figures,” however, you can see her use all of the techniques in this course in her work. Cay works with hundreds of sketches and drawings that she has created and uses them as a foundation for her paintings. She works in multiple mediums including oil, acrylic, collage, and charcoal. I cannot find a good interview video with her, however you can read about some of her process in the PDF provided here.
CLICK TO DOWNLOAD PDF
— Click on any image to see full image —


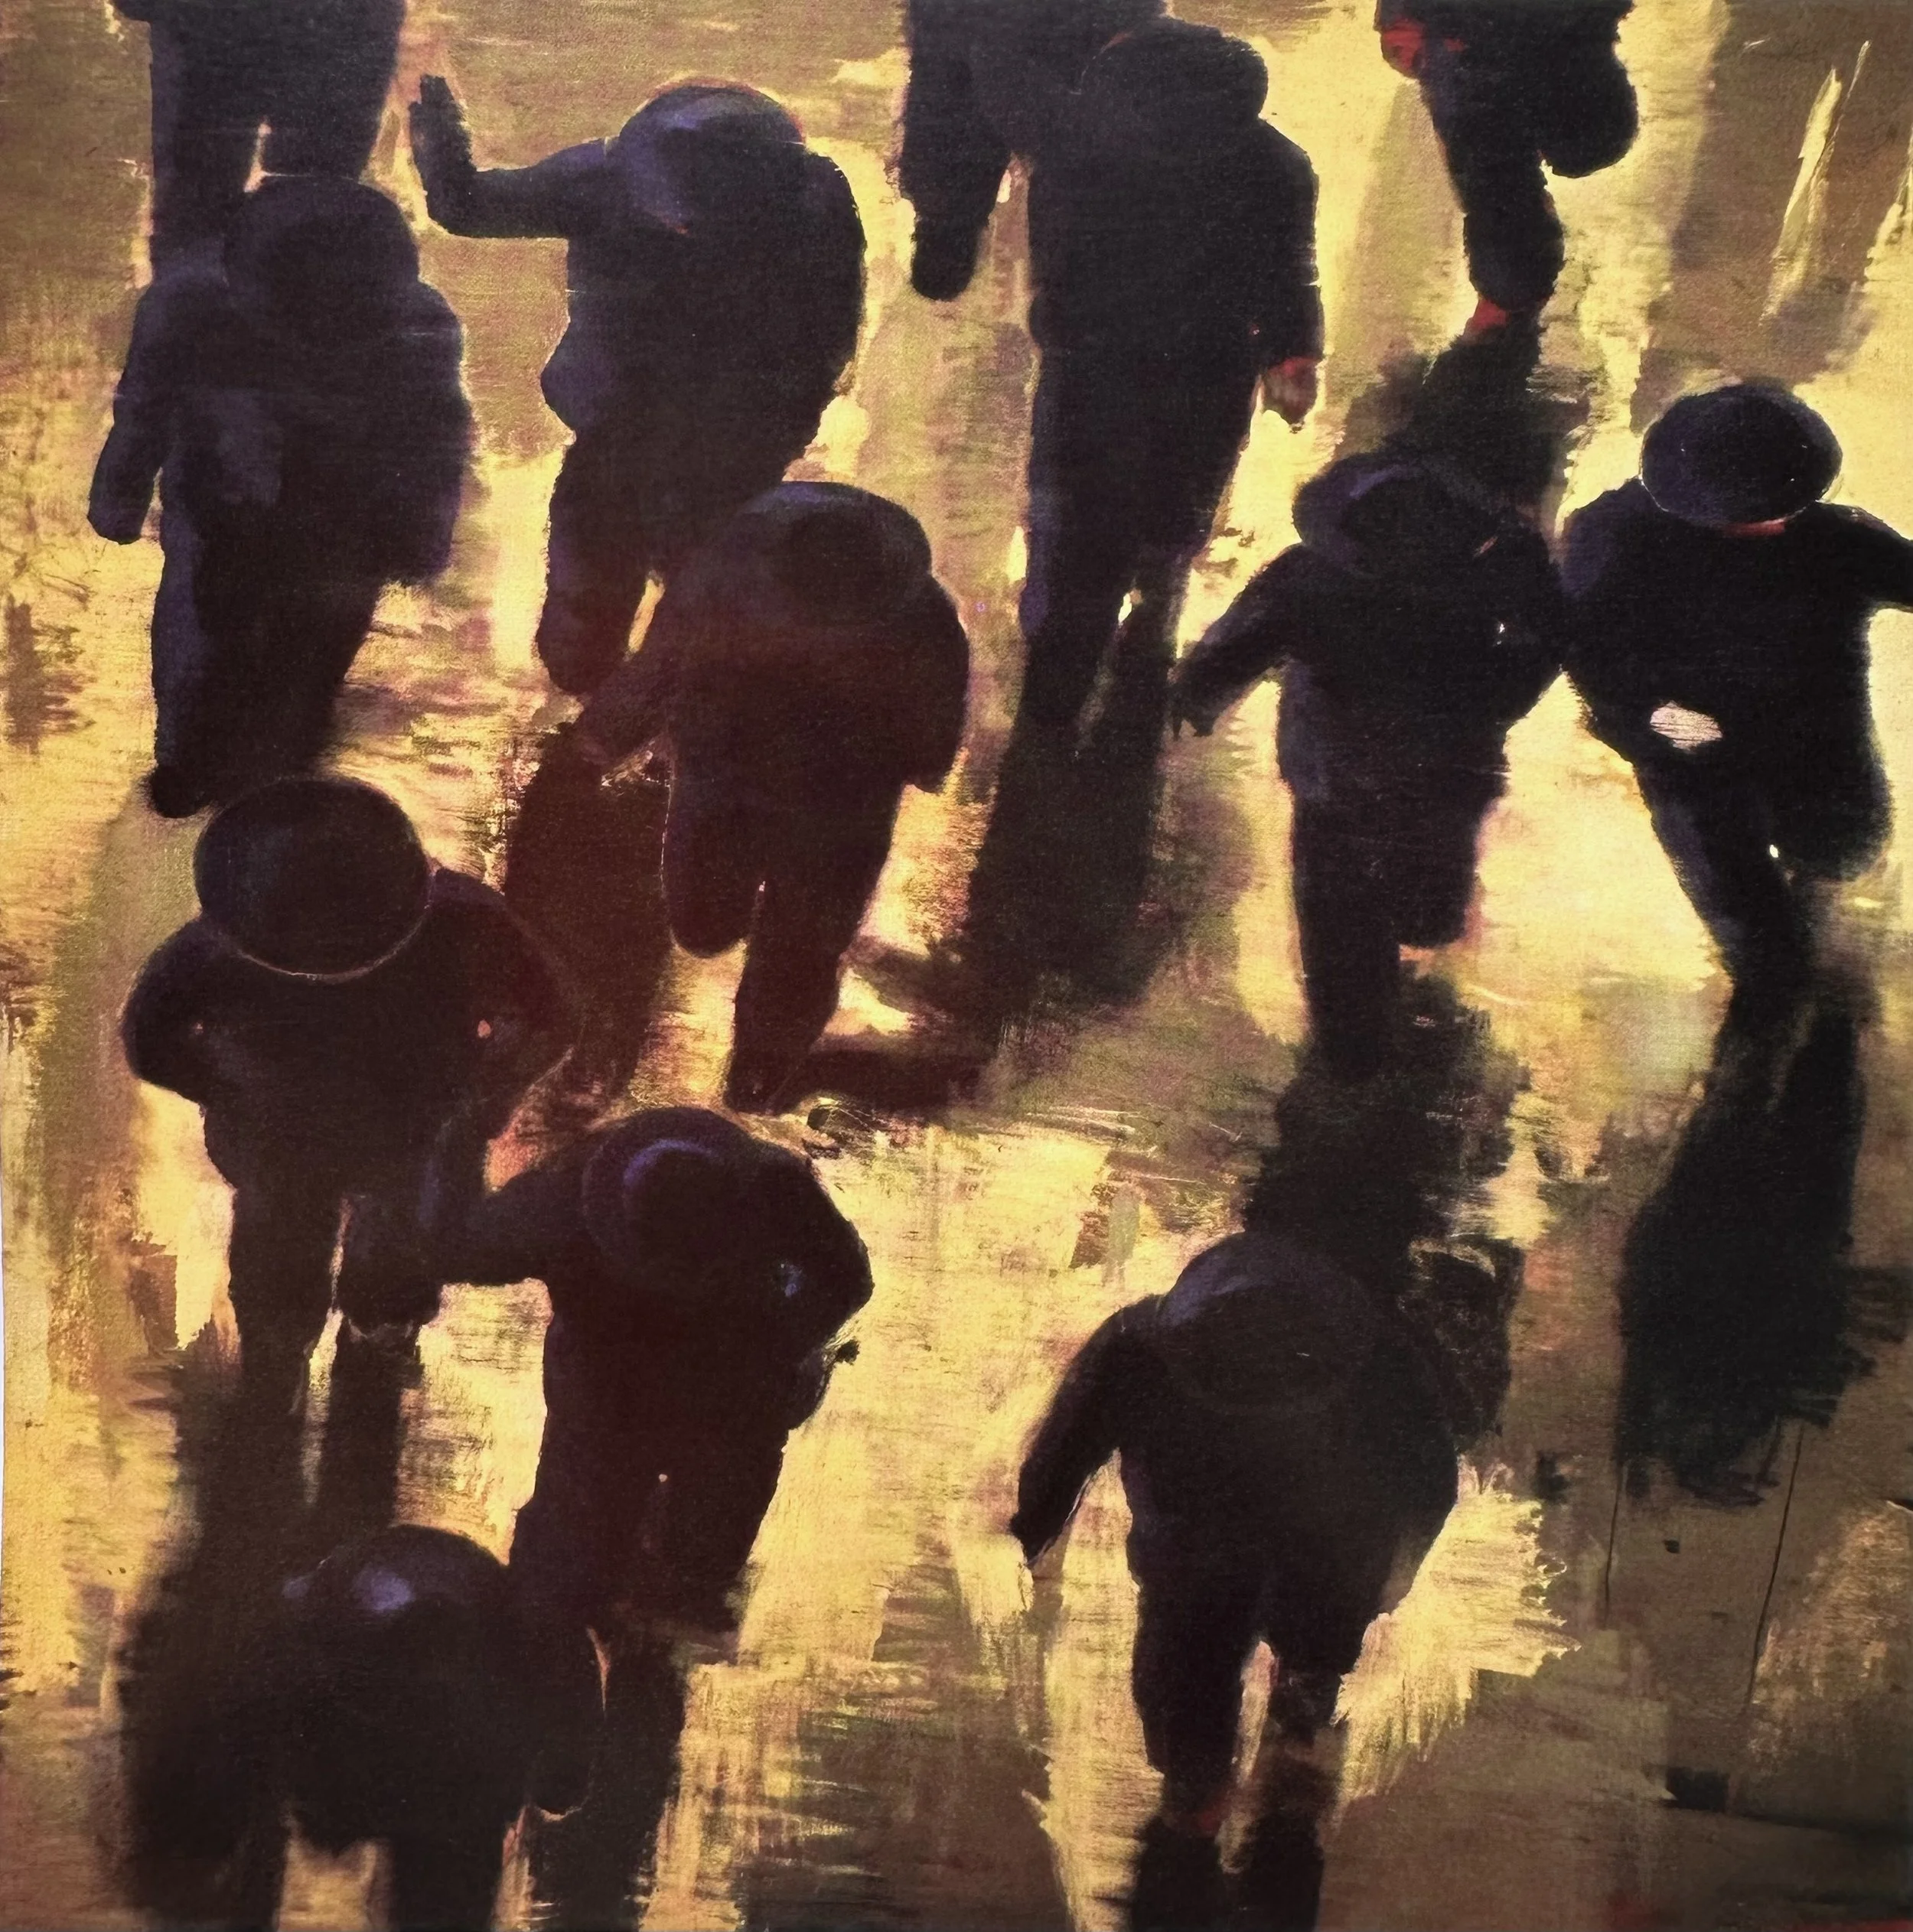
REPEATING FIGURES

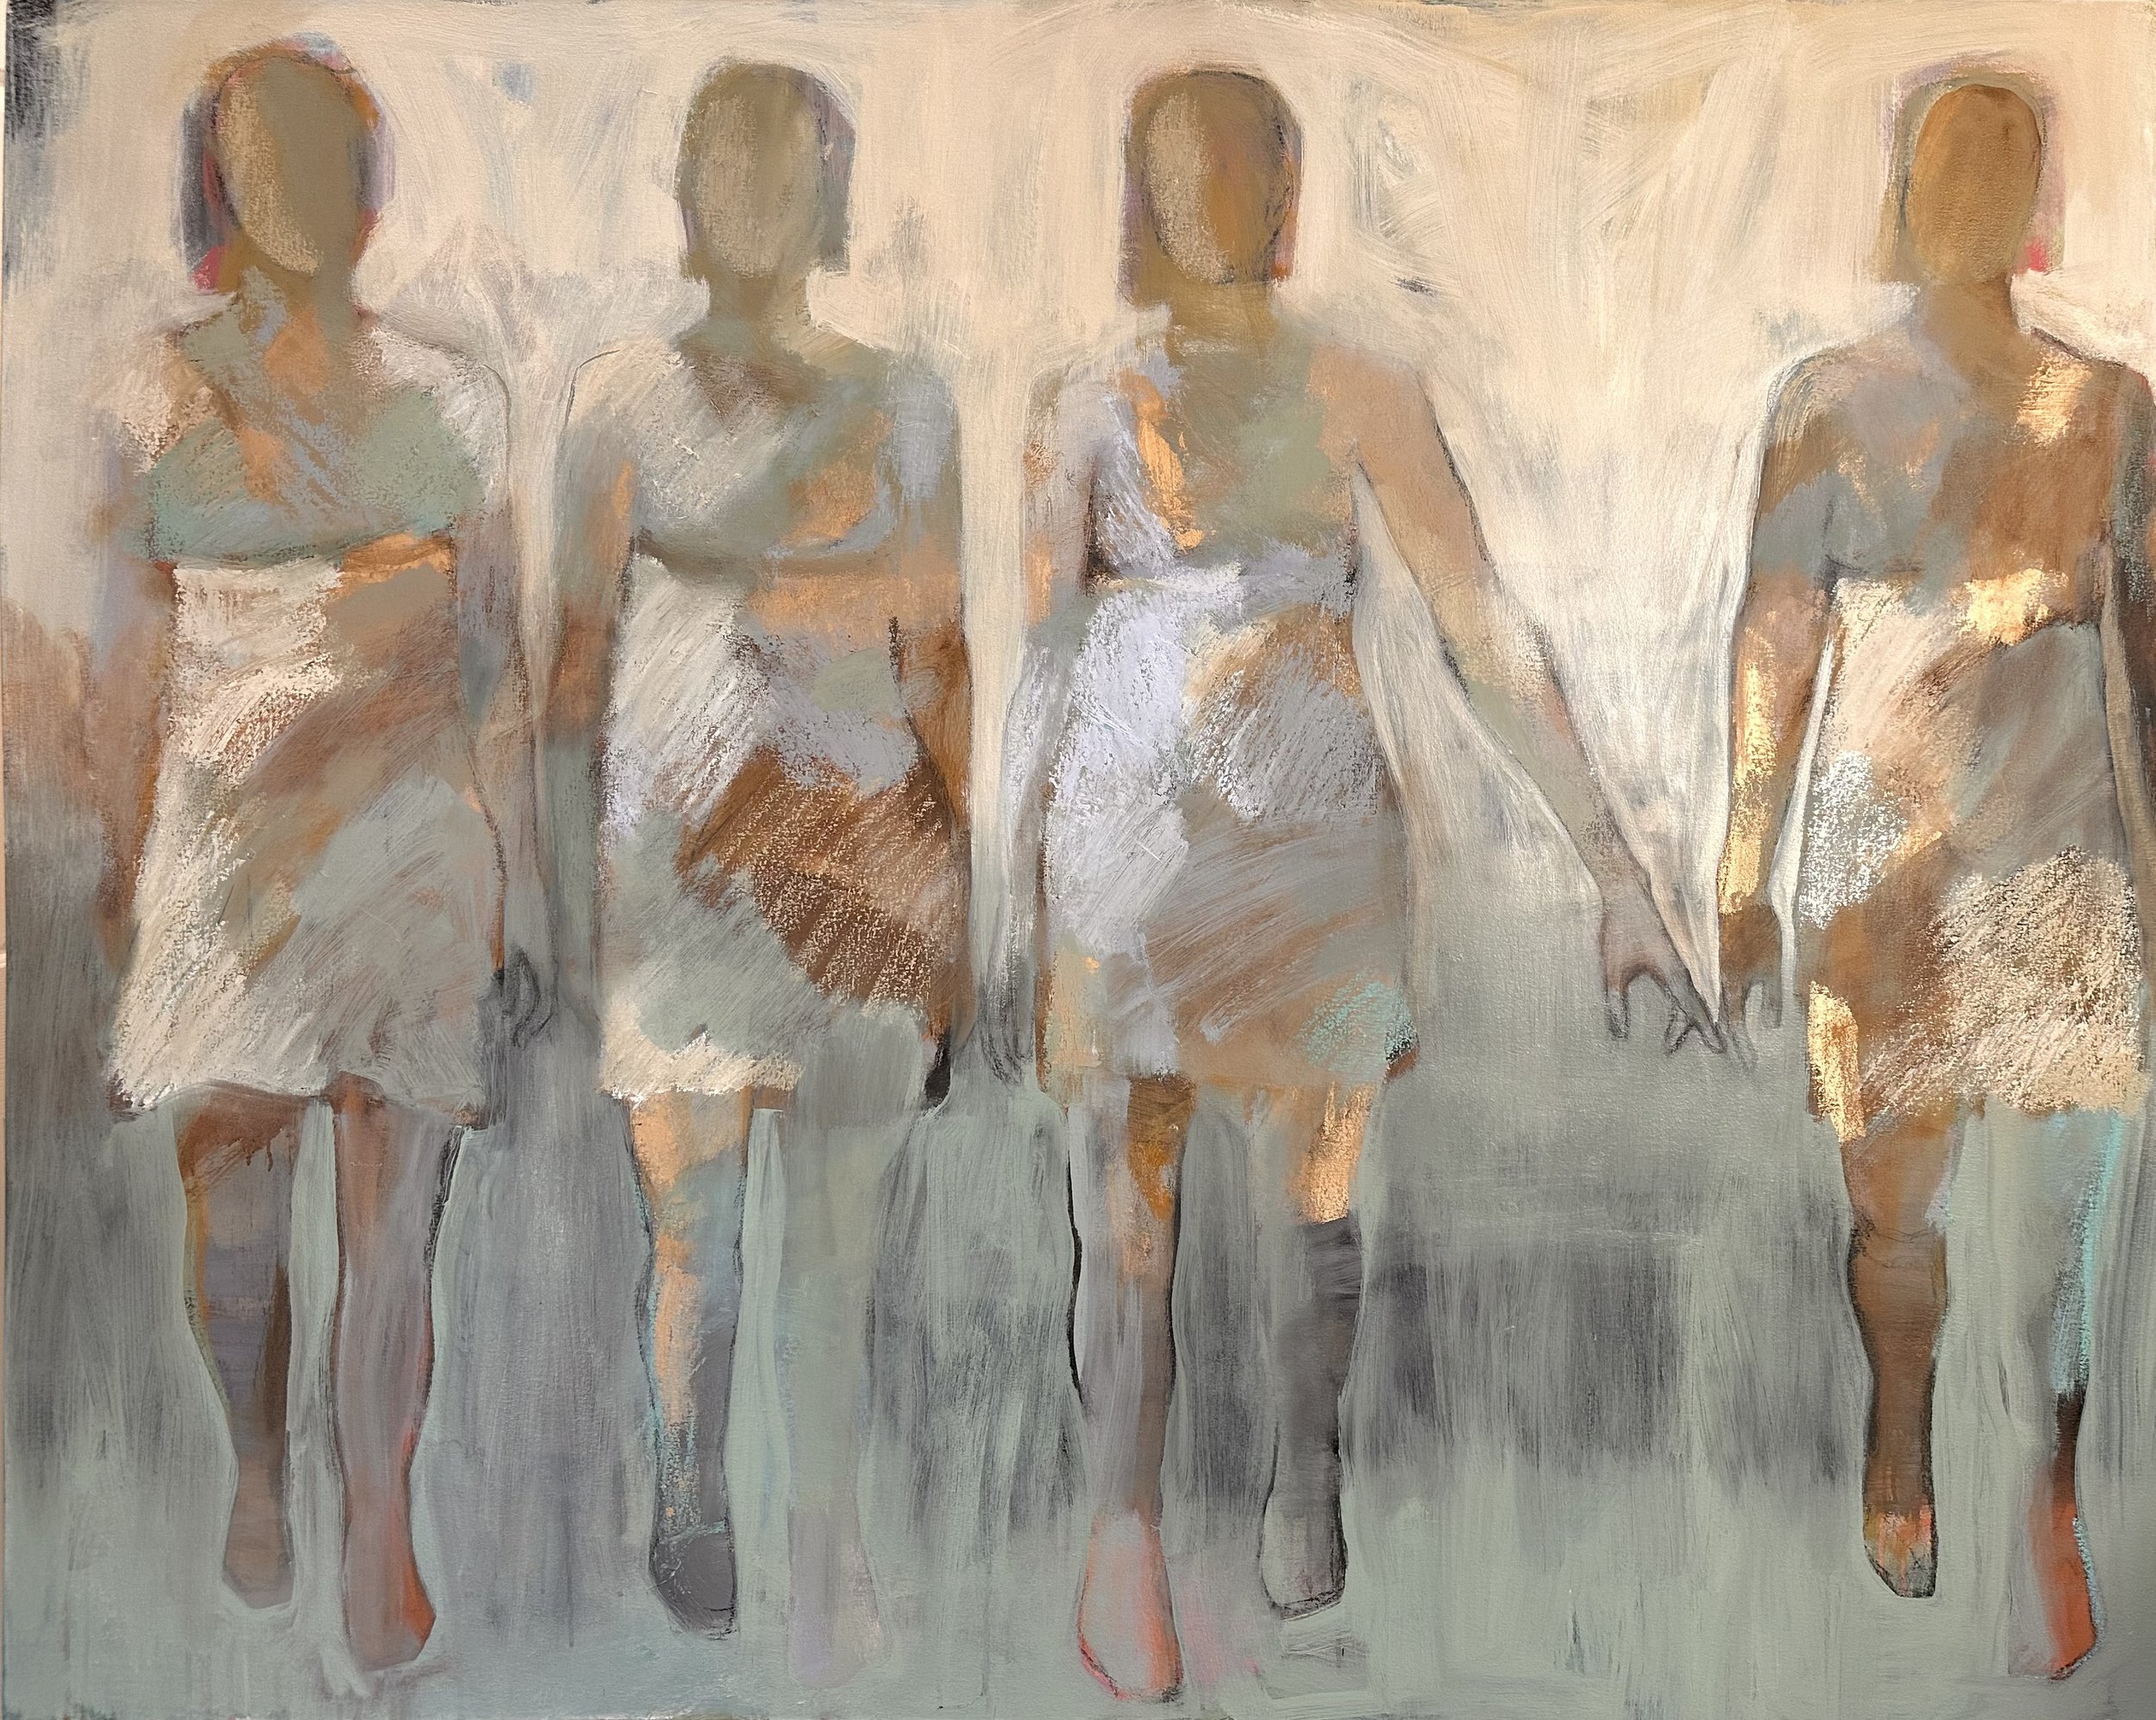
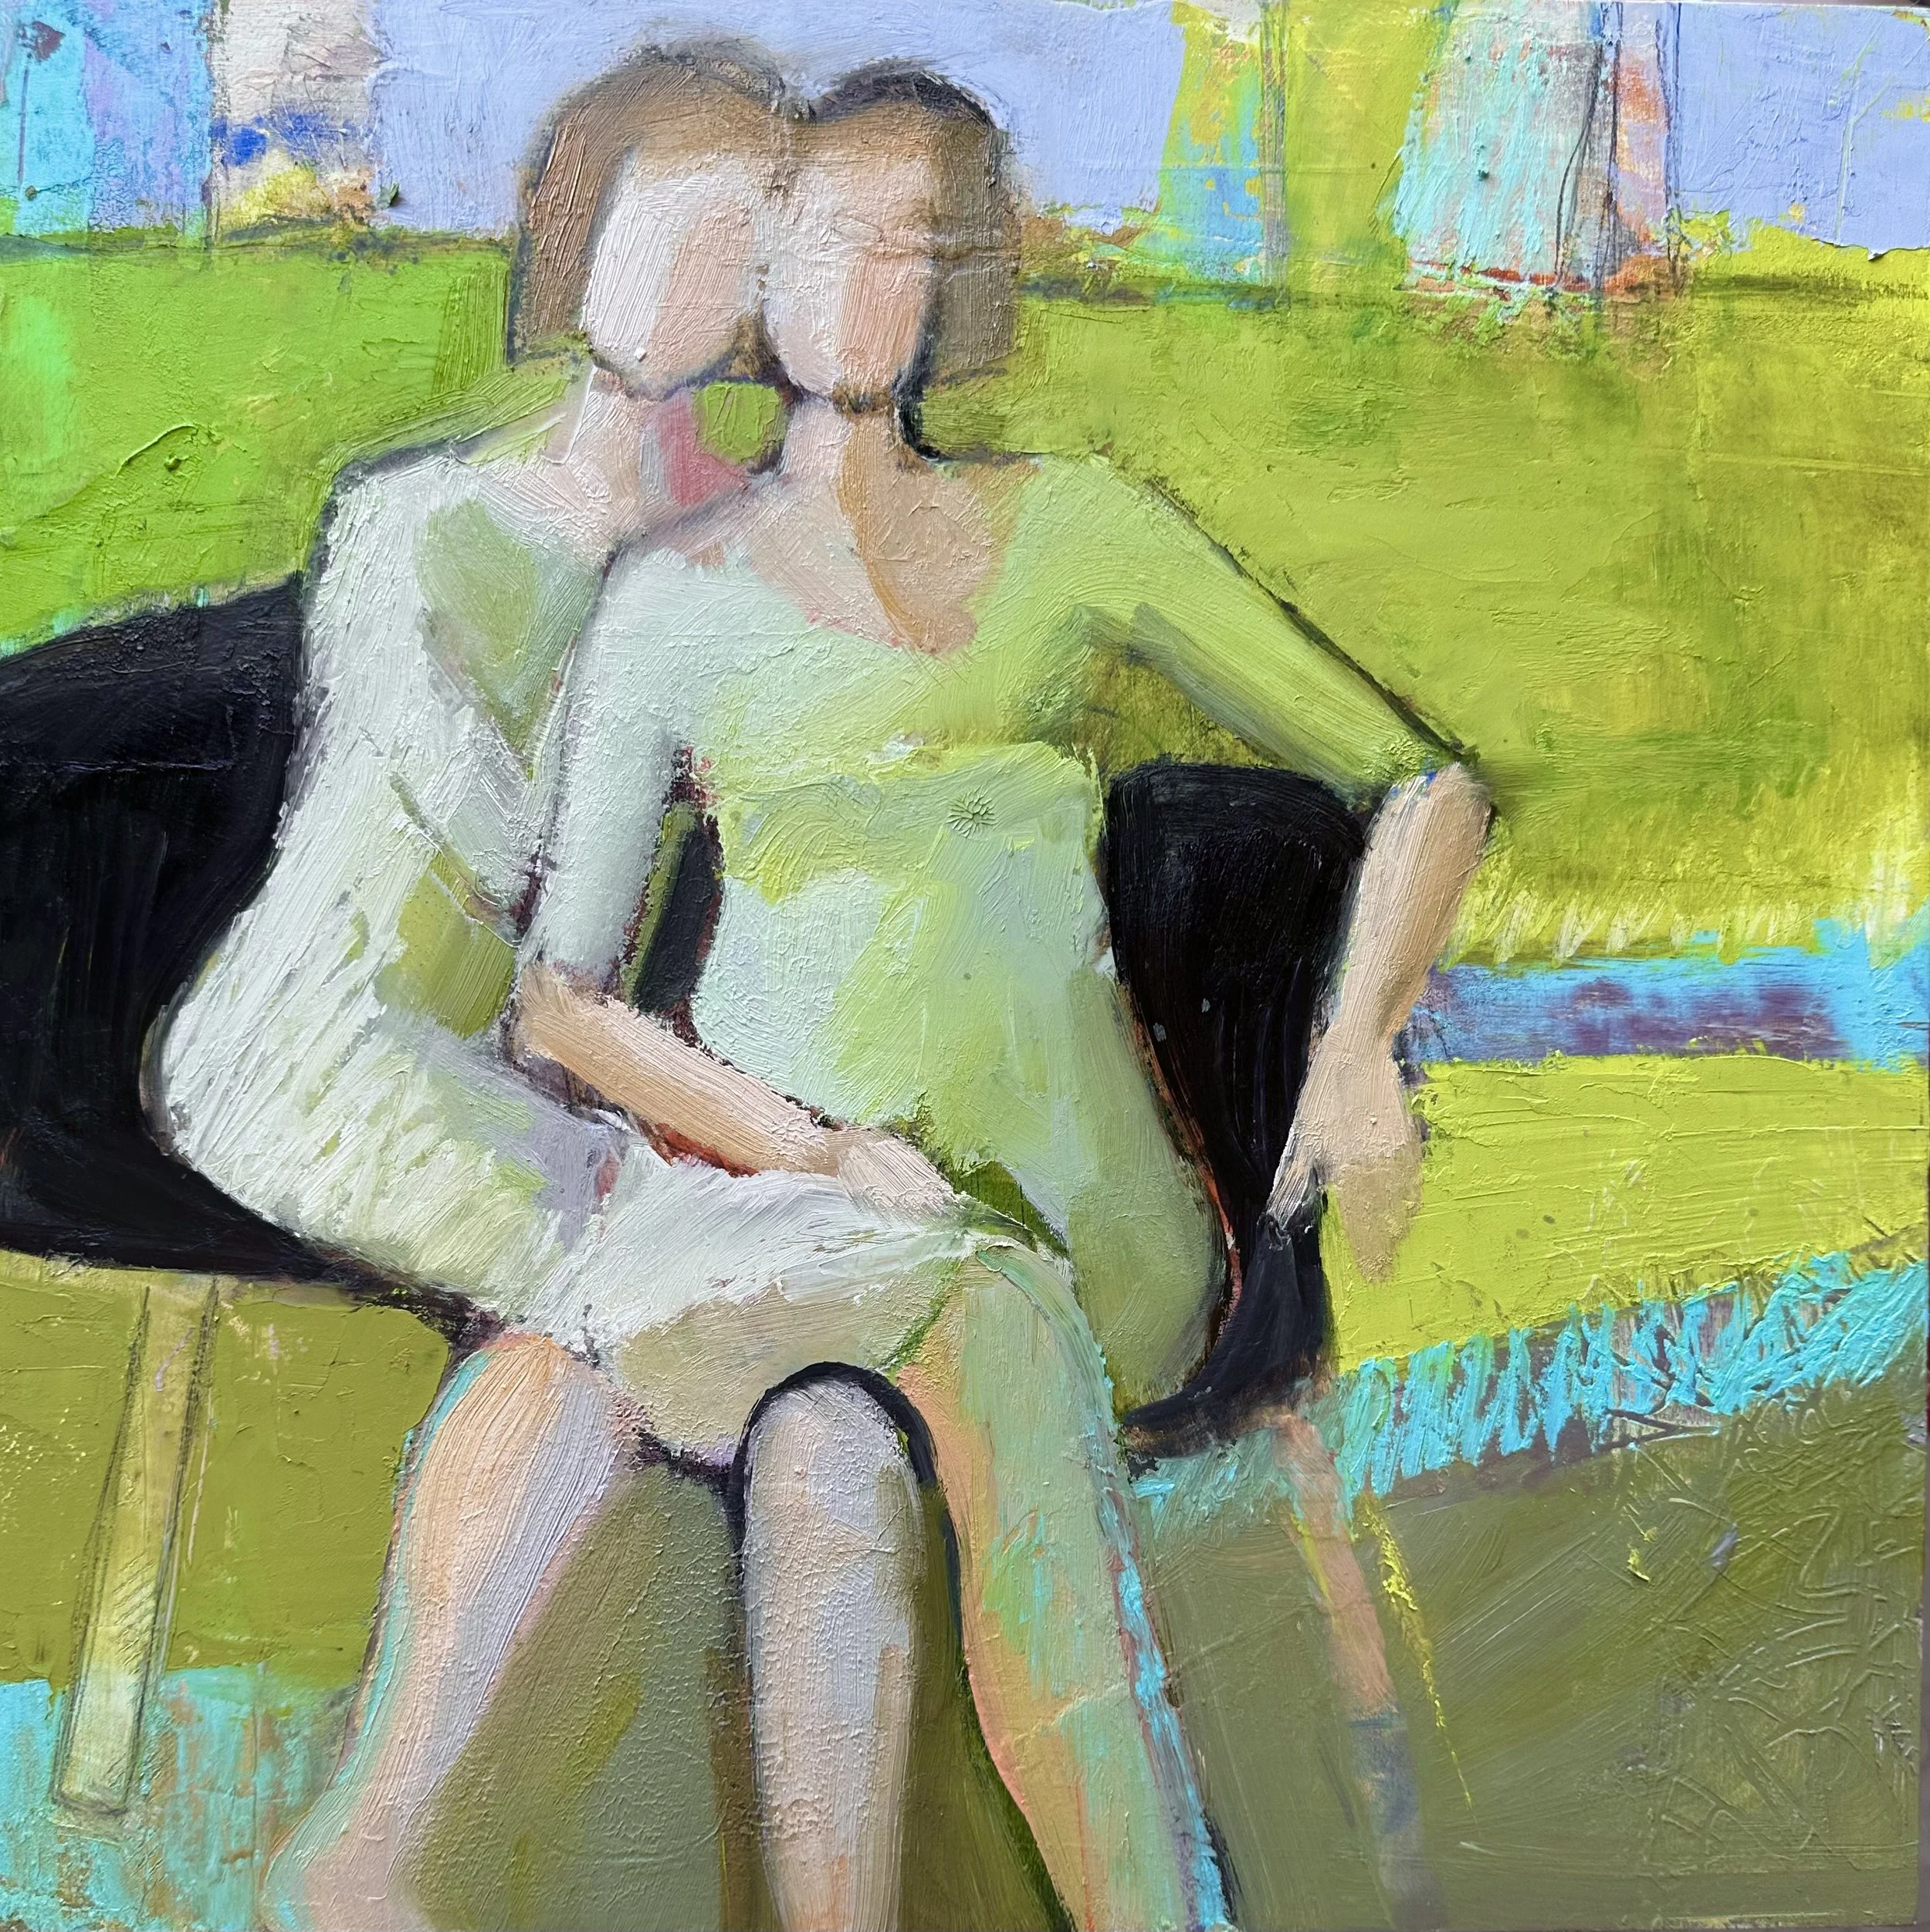
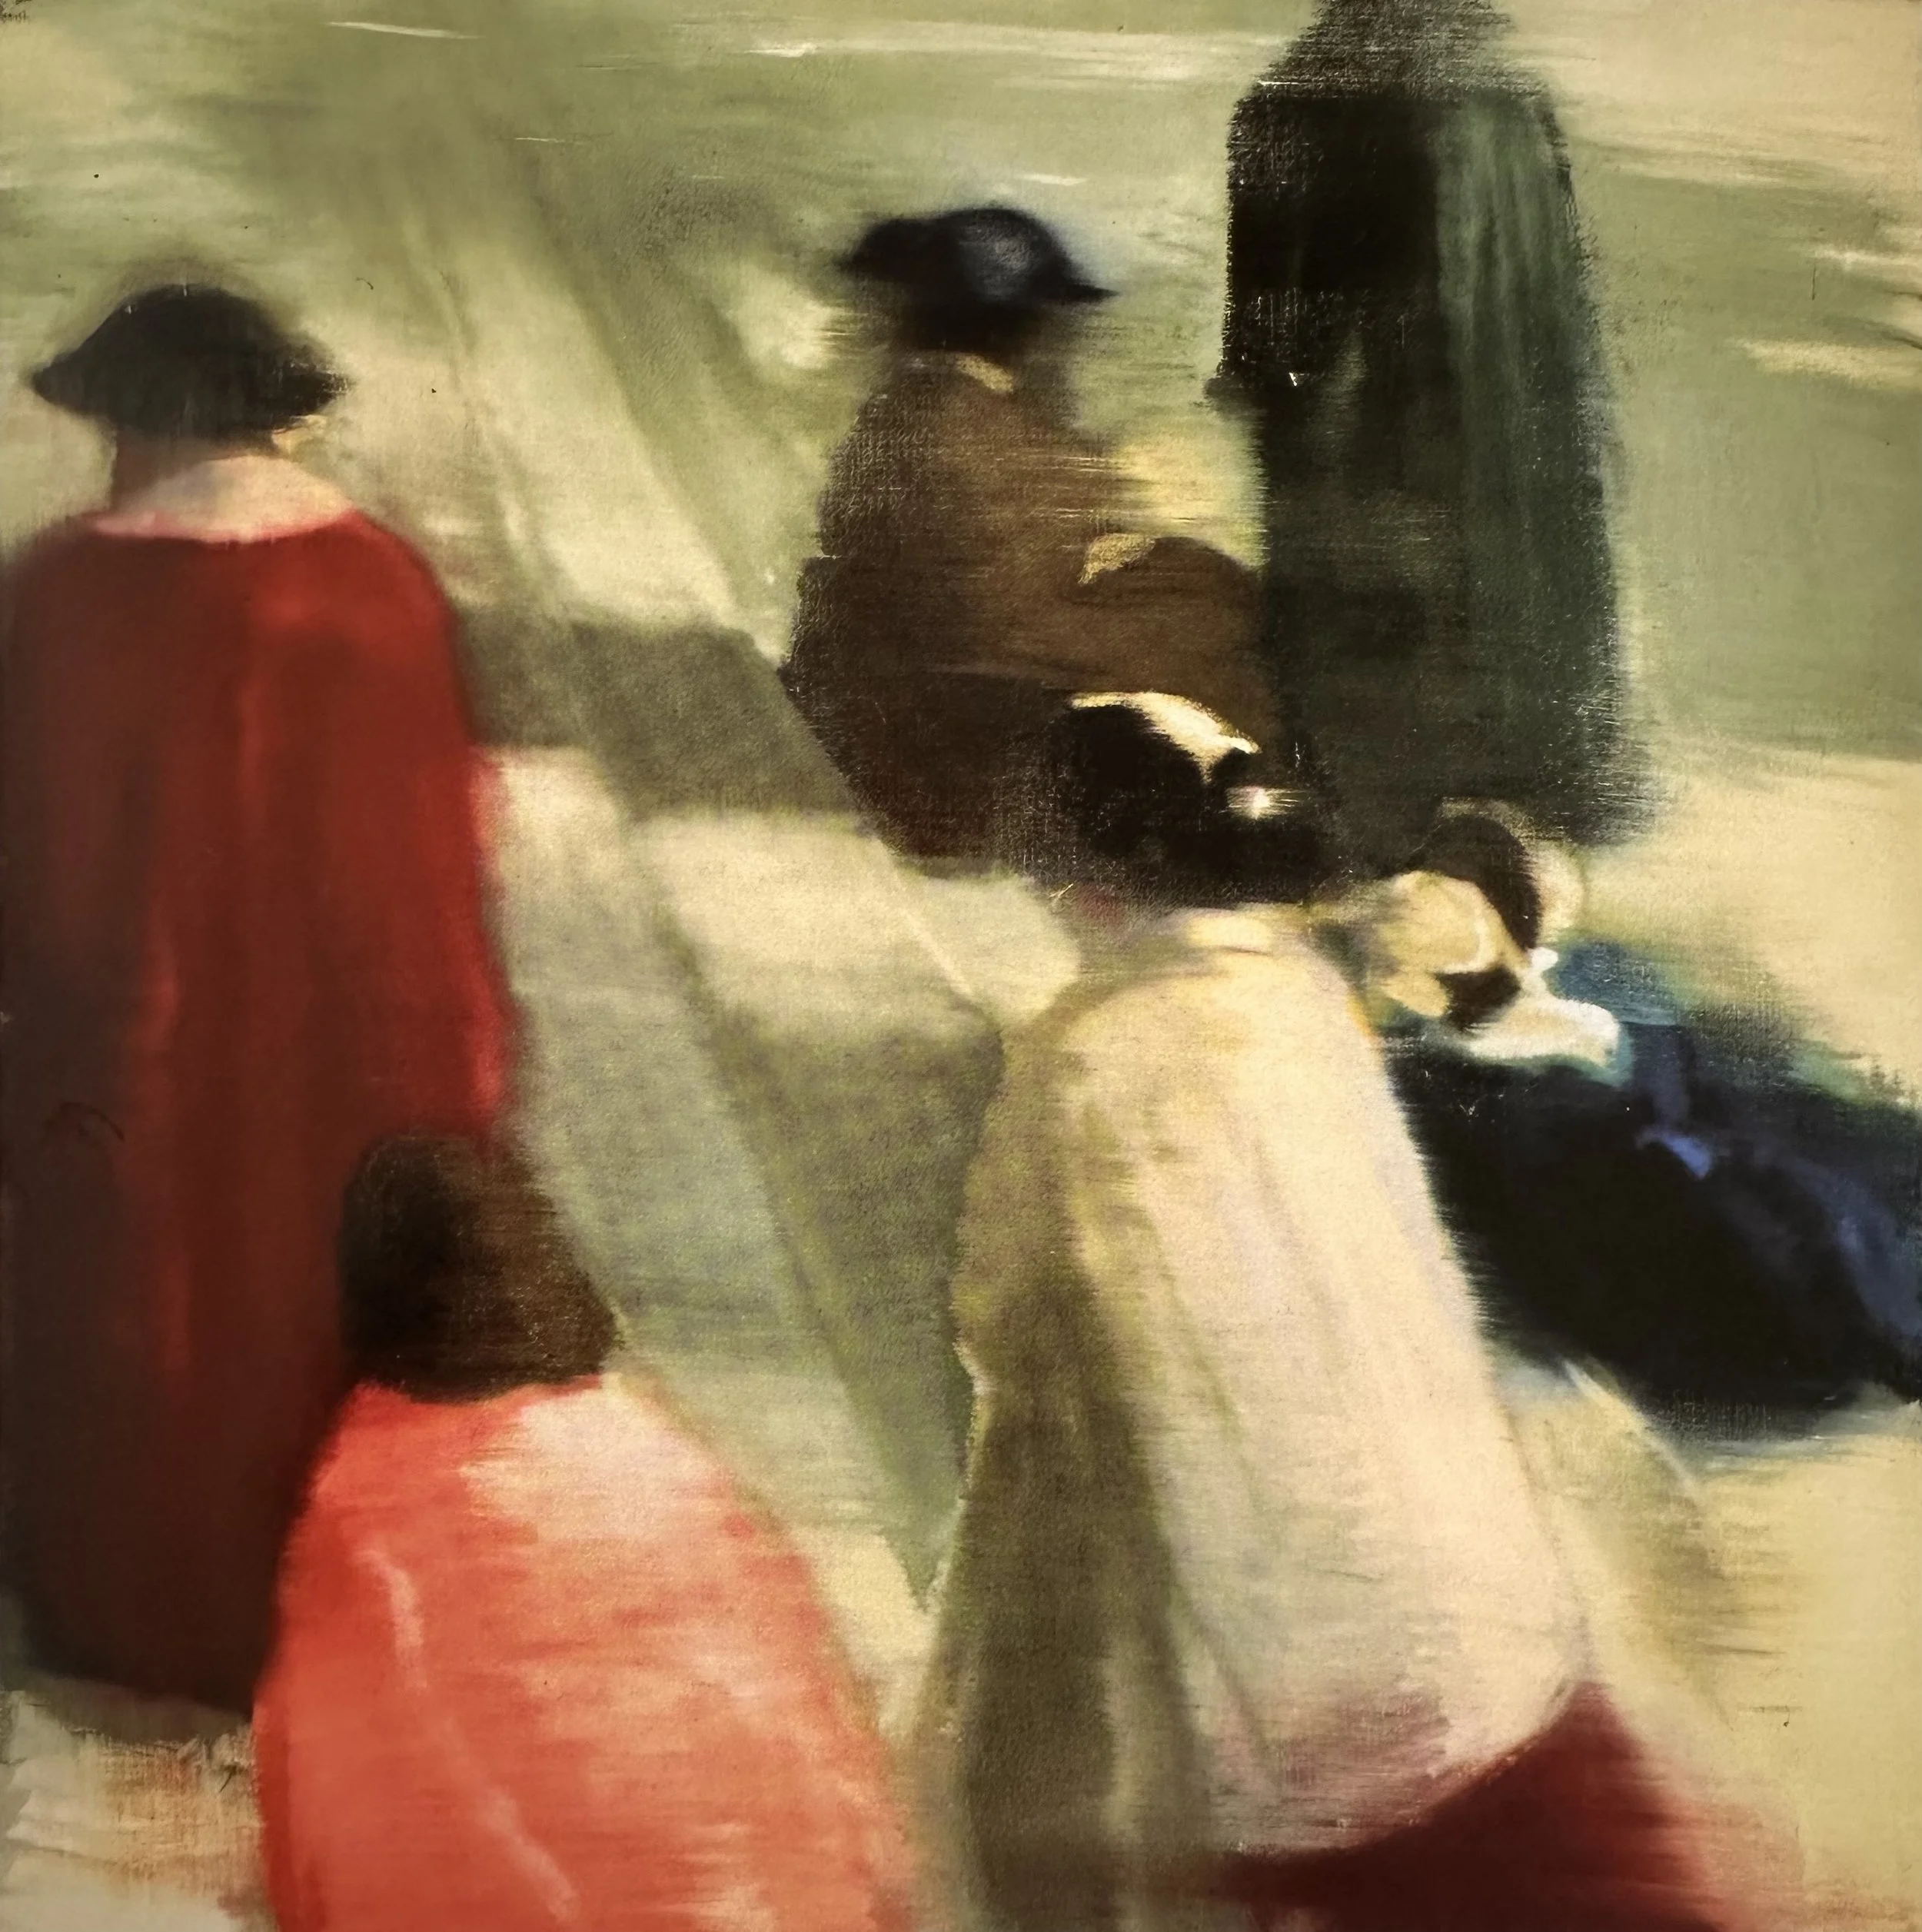
To date, this is my personal favorite approach to working with multiple figures. Many of my “multiple figures paintings” repeat or mirror each other.
”Repeating Figures” does not always mean repeating the exact same gesture or form. My interpretation of this concept is much looser. An example can be seen in the photo here. The figures are both walking, the gesture is different, but there is a sense of repetition.
Let’s look at this slide show below for examples and explanations.
Video: REPEATING FIGURES SLIDESHOW
Please Note: Each video in this course has its own unique password.
▸ VIDEO PASSWORD: Repeat
▸ VIDEO LENGTH: 11:02 minutes
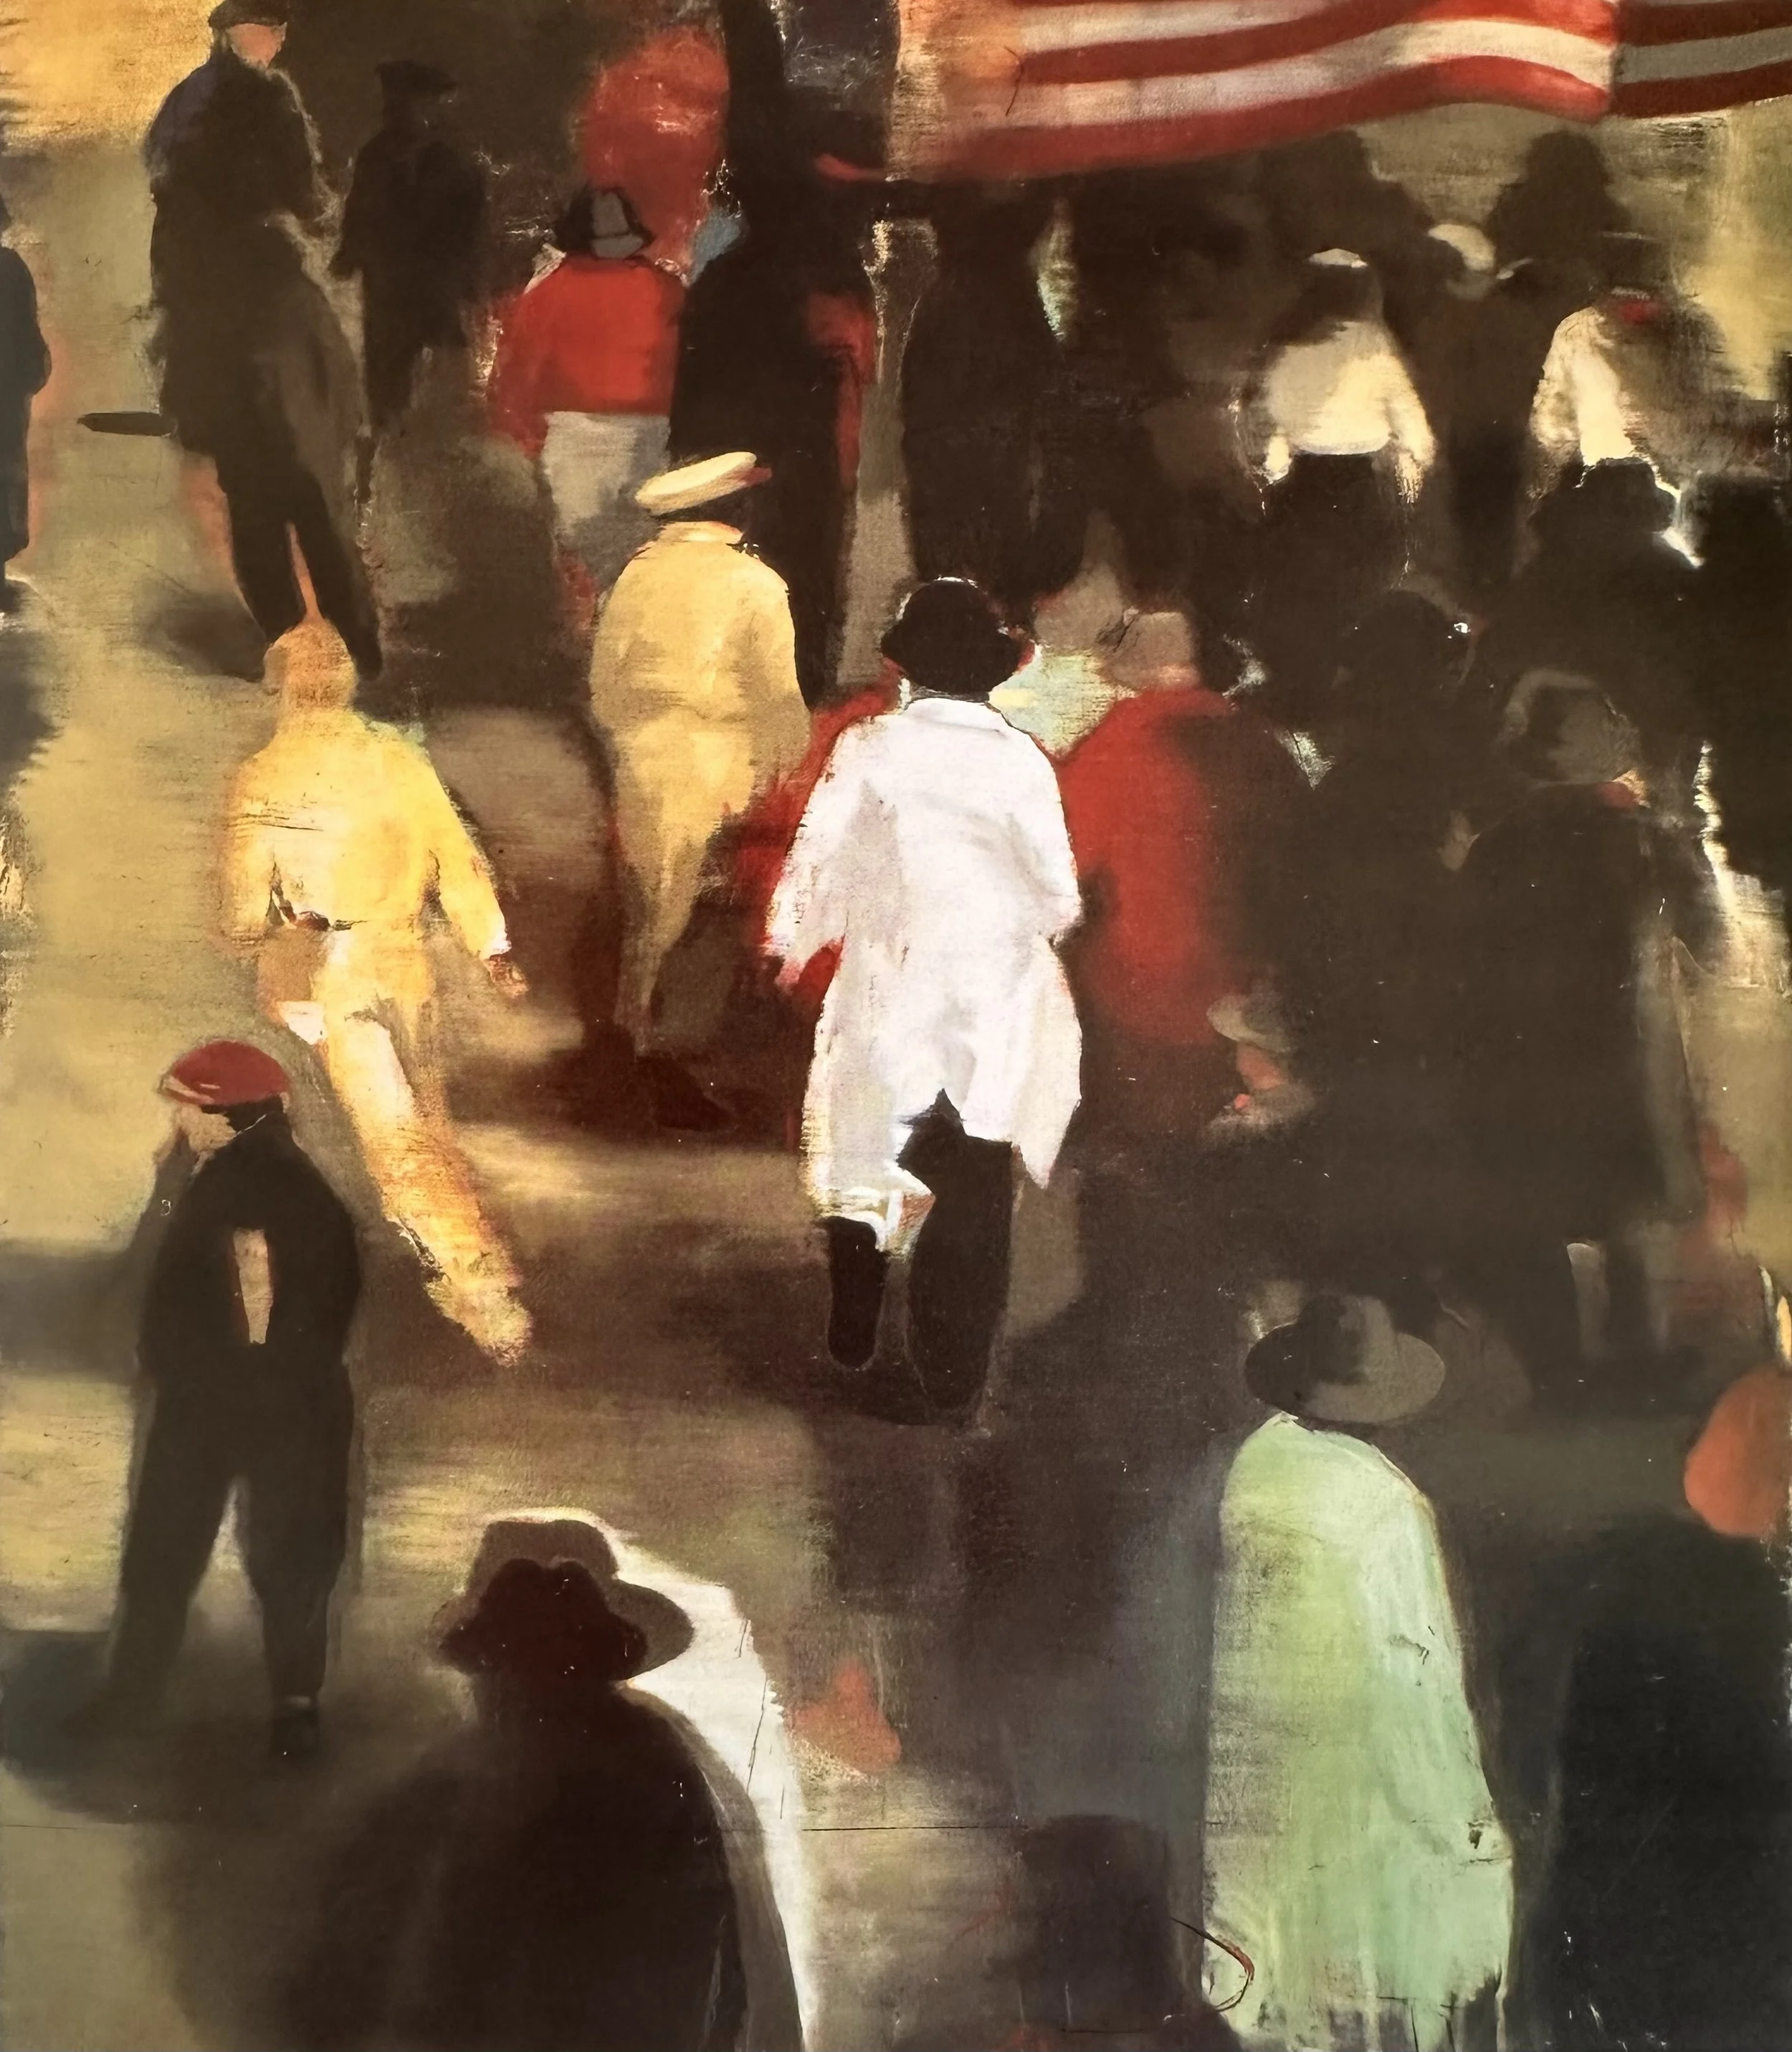
FUN HISTORICAL ANECDOTE
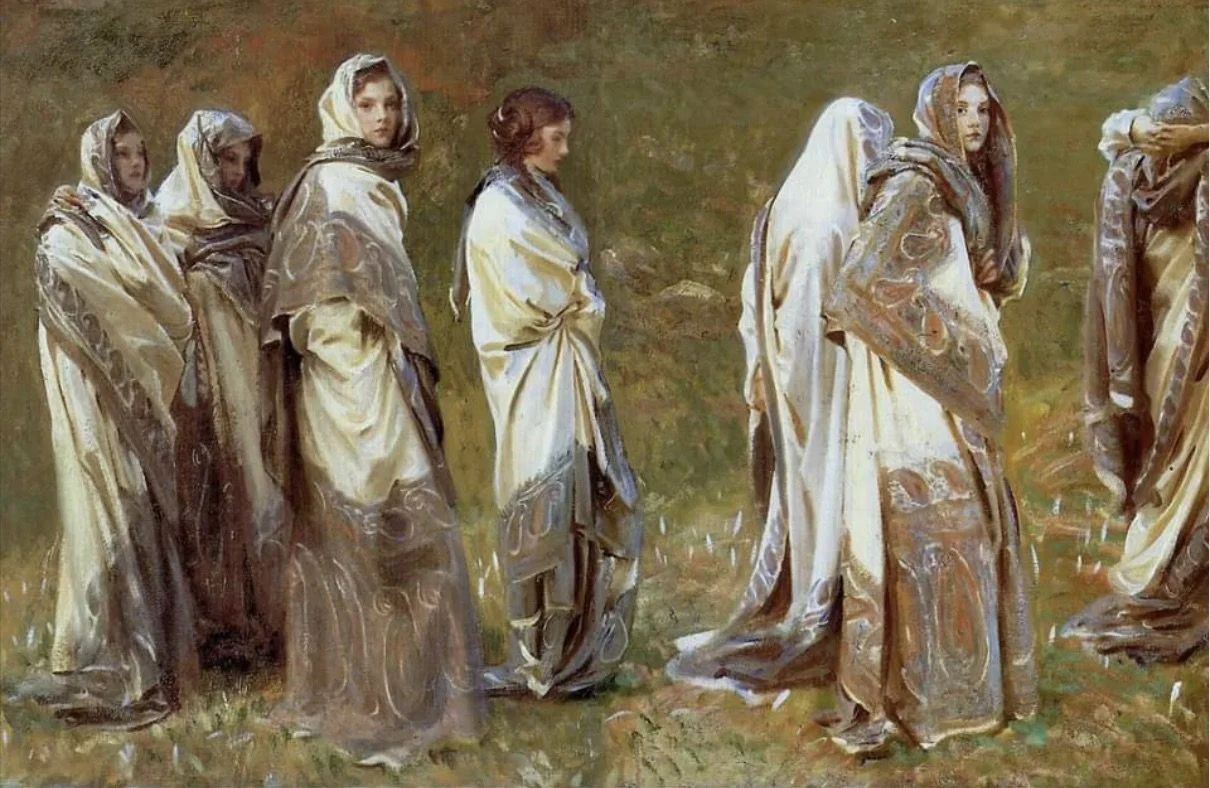
Painting by John Singer Sargent (1865–1925)
While designing this course I came across this painting by John Singer Sargent painted in 1908.
The image depicts Sargent’s niece in nine different poses.
The painting perfectly illustrates the concepts in this lesson, and shows that you can absolutely create realist work using these ideas!
Project: REPEATING FIGURES
In this demo I use oil and cold wax along with a bunch of oil bars mostly by R&F. I use a technique called Solvent Reduction which is somewhat specific to cold wax. I hope you enjoy seeing the process and the painting develop. If you are an acrylic painter you could do something somewhat similar by using multiple layers of relatively transparent paint possibly applied with a squeegee and then correcting with drawing tools. Whatever medium, the intentions is to stay loose, expressive and experimental.
Please Note: Each video in this course has its own unique password.
▸ VIDEO PASSWORD: Repeat
▸ VIDEO LENGTH: 33:50 minutes
R&F Oil Bar Colors Used: Kings Blue, Celadon Green, Mayrs Yellow Deep, Unbleached Titanium, Neutral White, Turquoise.
Gamblin Paint Colors: Radiant Blue, Radiant Turquoise, Titanium Buff, Titanium White, Raw Sienna, Gold.
YOUR TURN: Create a painting with repetitive figures.

Things to remember:
The figures do not need to be exactly the same.
Try photographing your model from different angles and using several angles in one painting.
Your negative space is important. Be aware of that as you design your composition.
Paint yourself or a family member in slightly different positions.
Have fun! Take Risks! Be a Fool!

Artist Focus
〰️
CHRISTOPHER BROWN
〰️
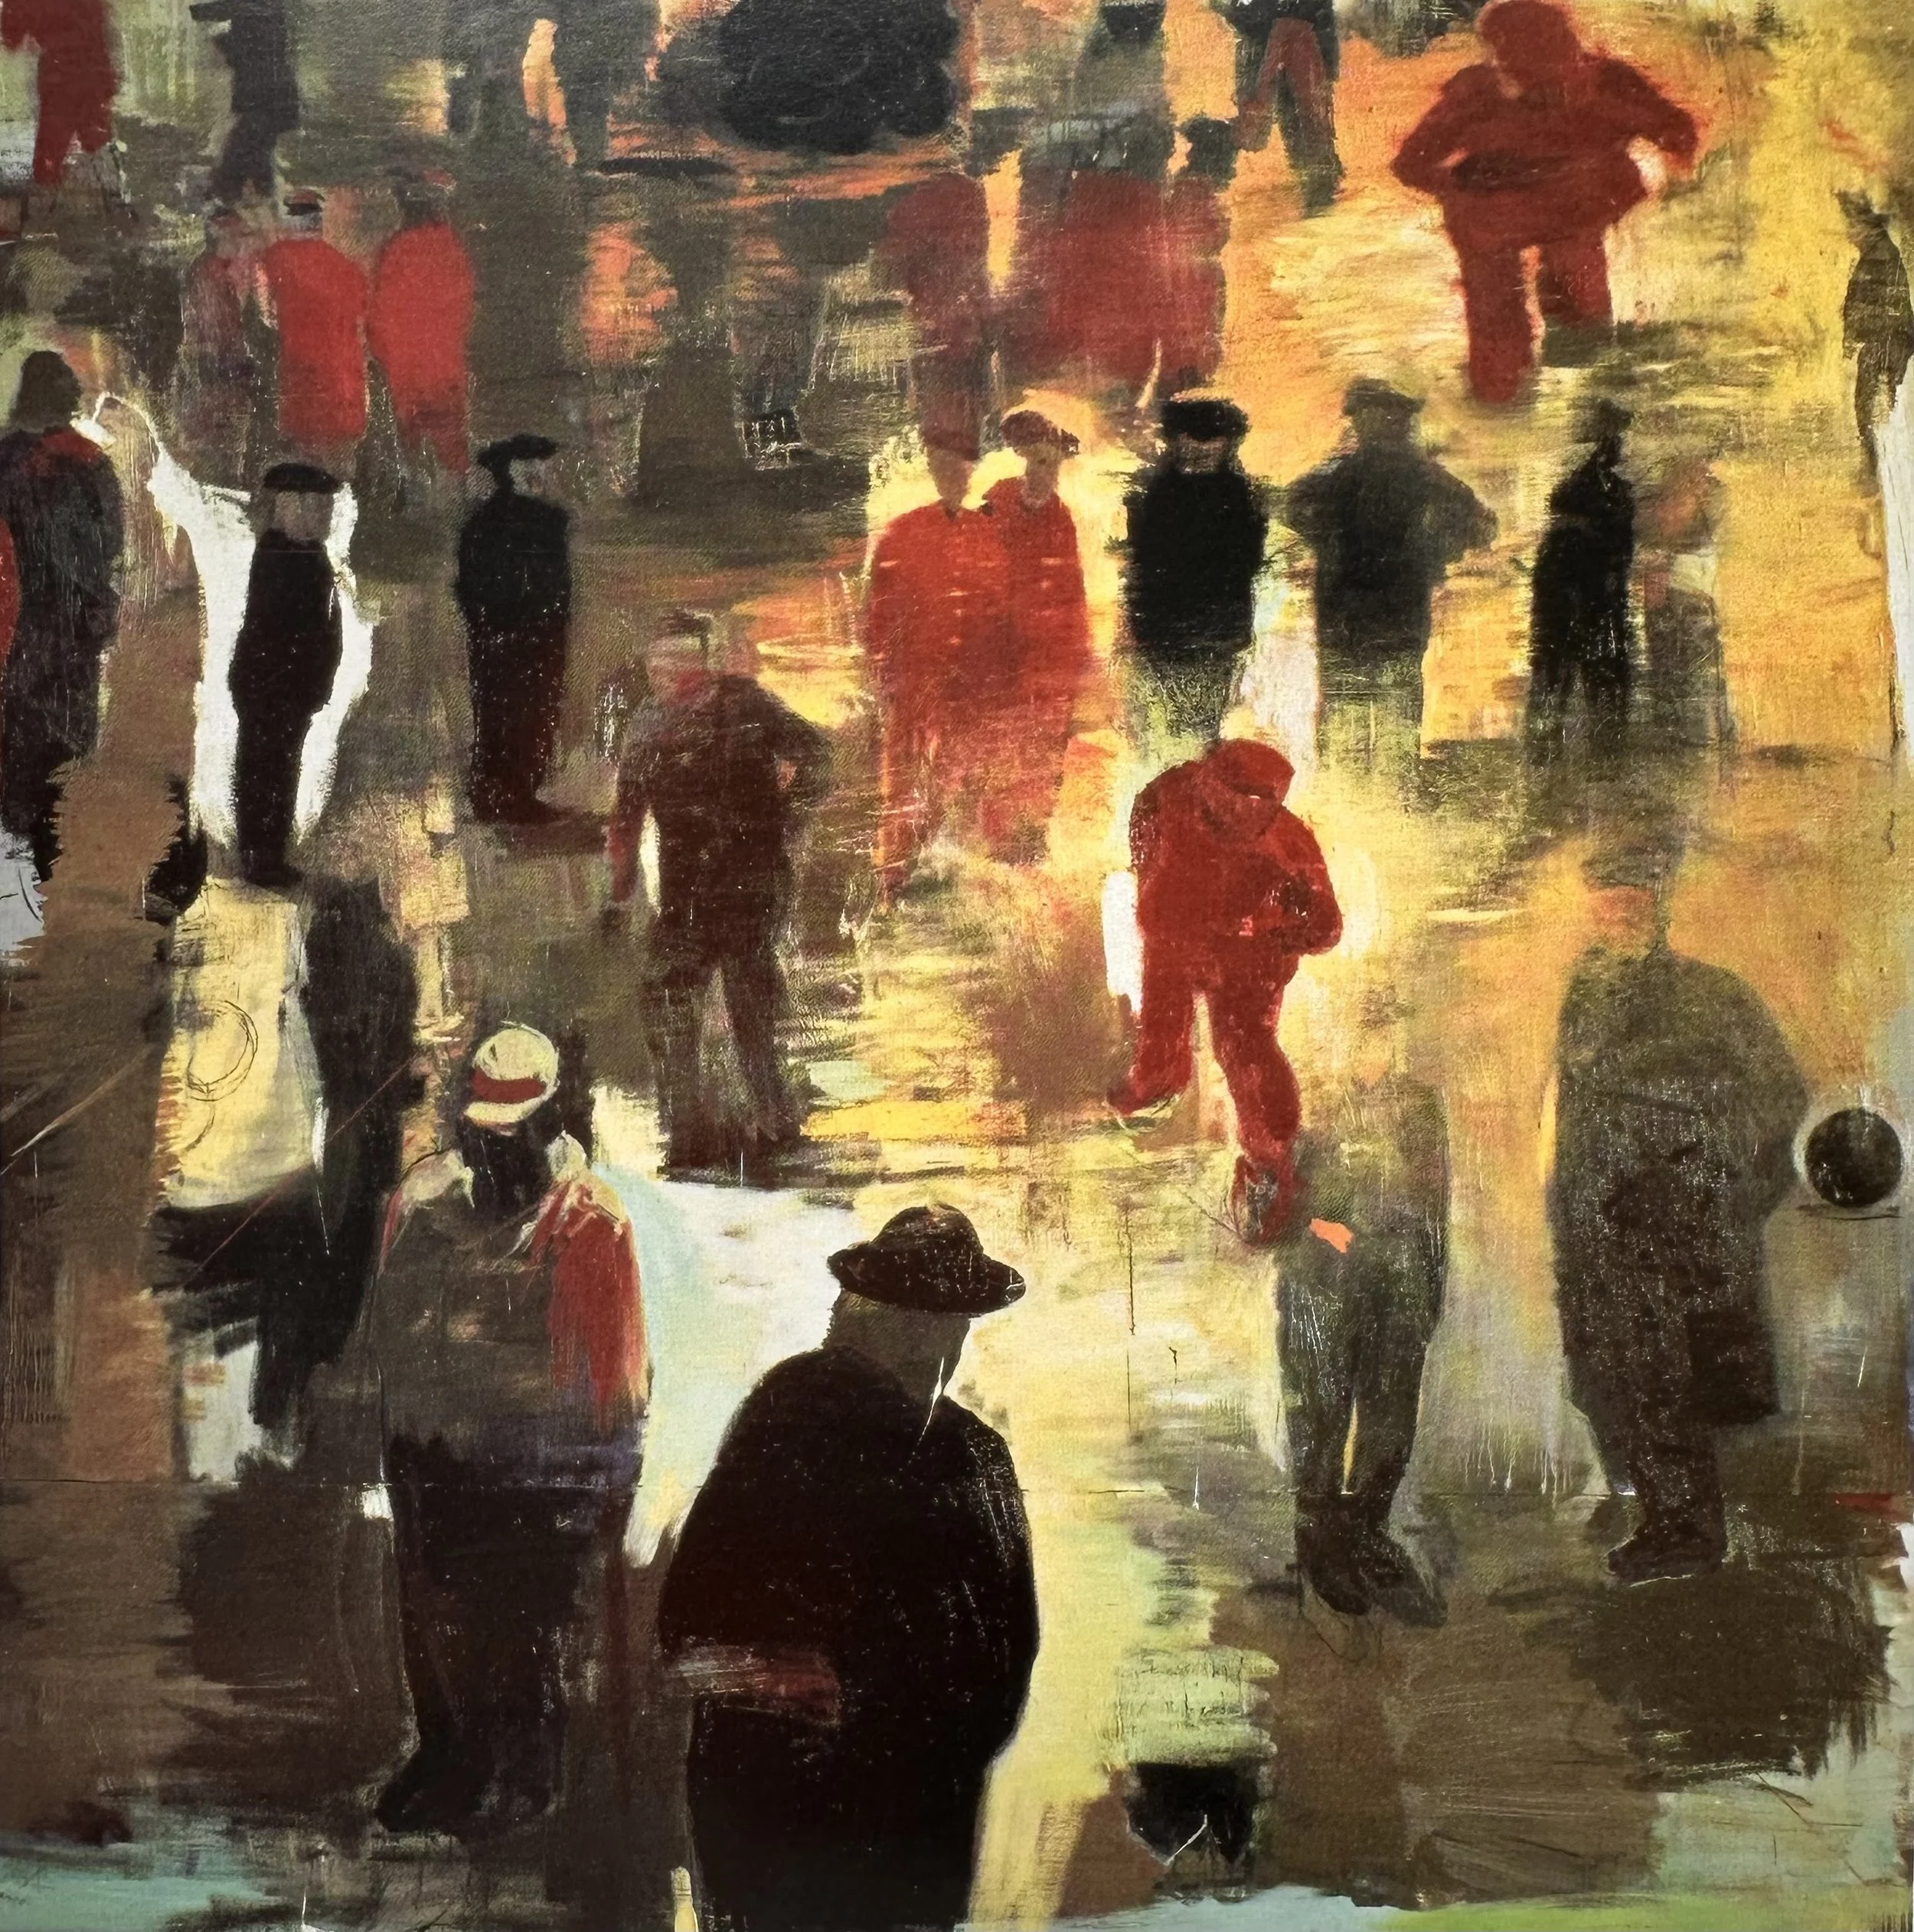
Artist Focus 〰️ CHRISTOPHER BROWN 〰️
Christopher Brown created a series of repeated figures a number of years ago. In many of these paintings he filled the large canvas with walking and/or repeated figures. Again, many of these were not the exact same figure, but I think you can understand the concept. He works quite differently now and his paintings are always interesting and developing. The video below is excellent and I recommend checking out his website to see his current work.
— Click on any image to see full image —


VIDEO: A look inside Chris Brown’s studio—older, but still excellent!

IT’S A WRAP!
Until We Meet Again…
“Let the fool run wild while you explore these concepts.”
Creating a strong painting with one figure can be a challenge. Creating a strong and interesting composition with multiple figures can be daunting and takes practice. Remember to be patient with yourself, quiet that inner critic, and give yourself the freedom to explore play and learn.
“As always, thank you again for your continued support of my work and courses. I truly appreciate you!”